Mexican hot chocolate is a smooth and spicy combination of flavors, infused with cinnamon, cayenne, and cocoa.
Lately, I’ve seen this flavor combination popping up in a variety of foods and beverages. From a mug of hot chocolate to beer to sweets of all sorts, it’s an ideal way to spice things up for your taste buds.

Plus, it’s perfect to make just in time for Día de los Muertos.
If you are unfamiliar with the annual Day of the Dead, it is a holiday of Mexican origin that honors family members and friends who have died with festivals and celebrations that include ample food and drink, both enjoyed by the celebrants and given as offerings.
It’s the flavors of this holiday that inspired this cookie, which is easy to make, and even easier to eat. Alongside tamales, pan de muerto, and sugar skulls, you’ll often also find a variety of alcoholic beverages, masa drinks, and hibiscus tea. But what about chocolate?
As a holiday with origins that can be traced back to an Aztec festival to celebrate the goddess Mictēcacihuātl, or the “Lady of the Dead,” what better treat could be served than one to honor the ancient Aztec tradition of consuming cacao in a spiced hot beverage?
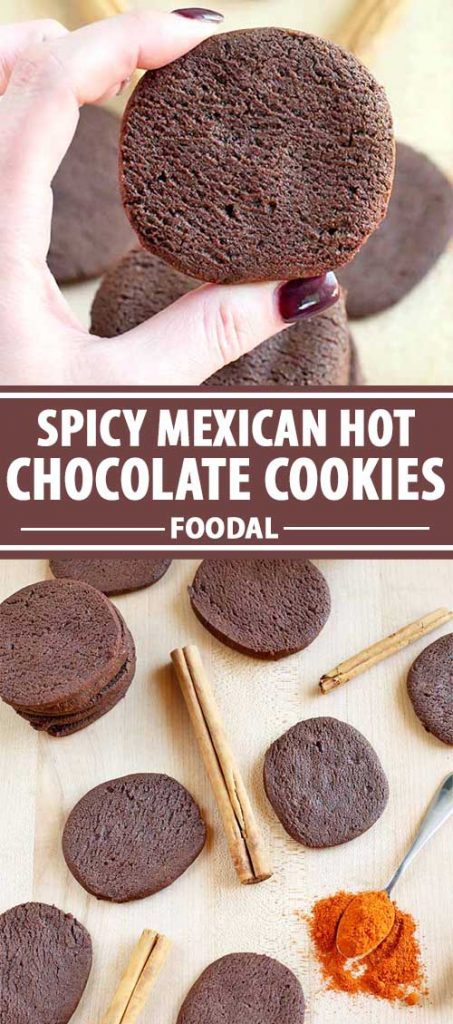
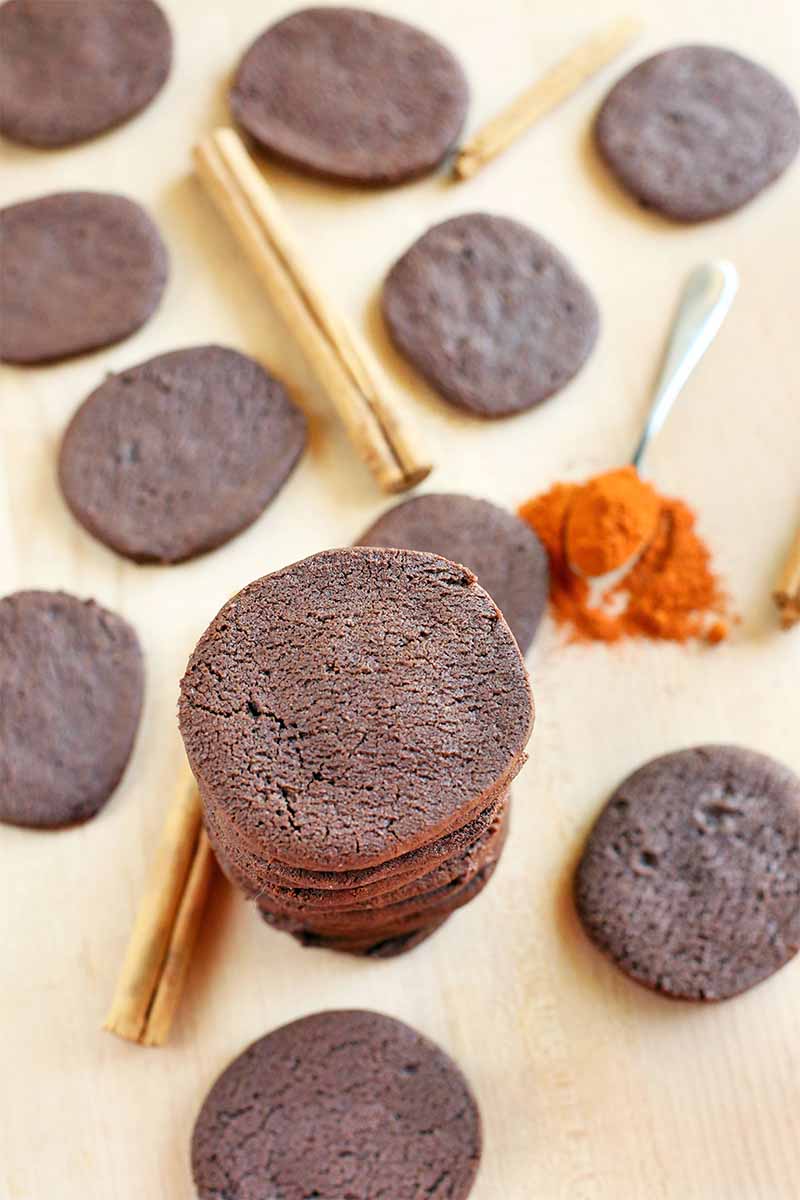
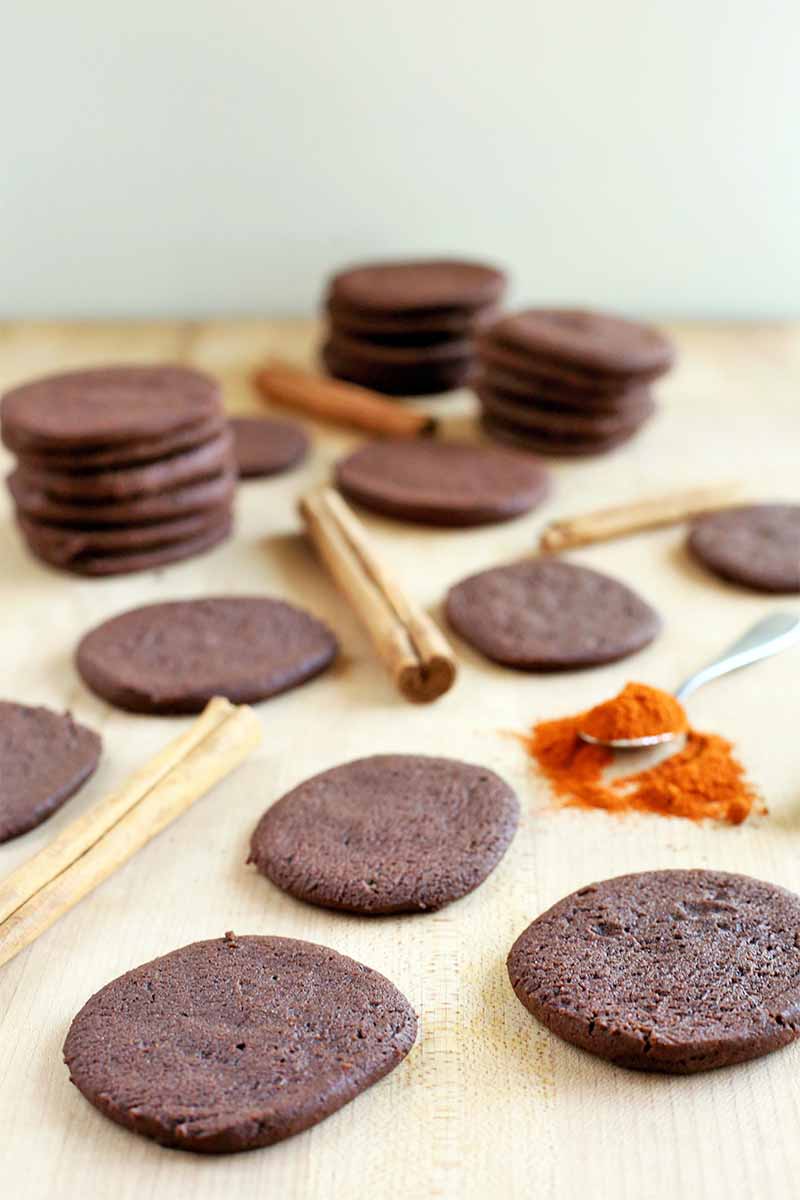
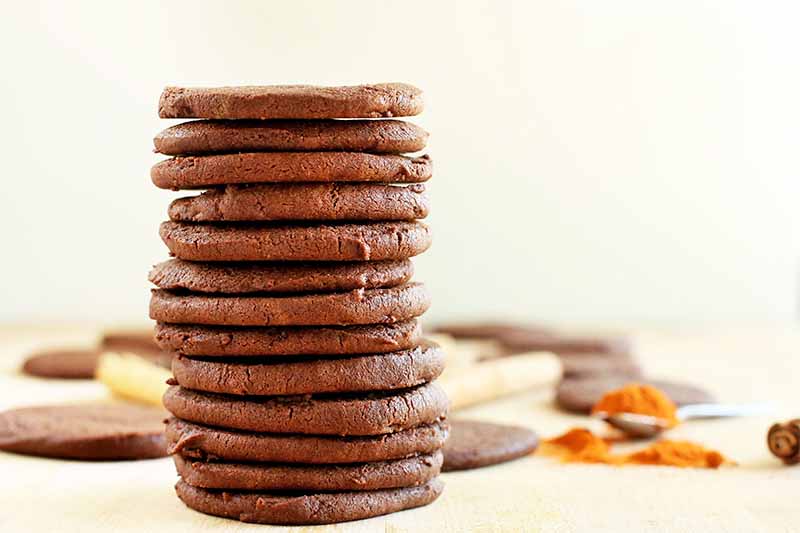
Mexican hot chocolate is a classic flavor combination, and you can really taste each of the key ingredients in every bite of this cookie, a lightly sweet, easily portable treat that combines dessert with the dark, bitter, and spicy flavor notes of the hot chocolate.
The comfort of the warming cinnamon. The spice and heat of the cayenne pepper. The richness of the cocoa powder. They are all key ingredients in the dough, and you can taste each and every one of them.
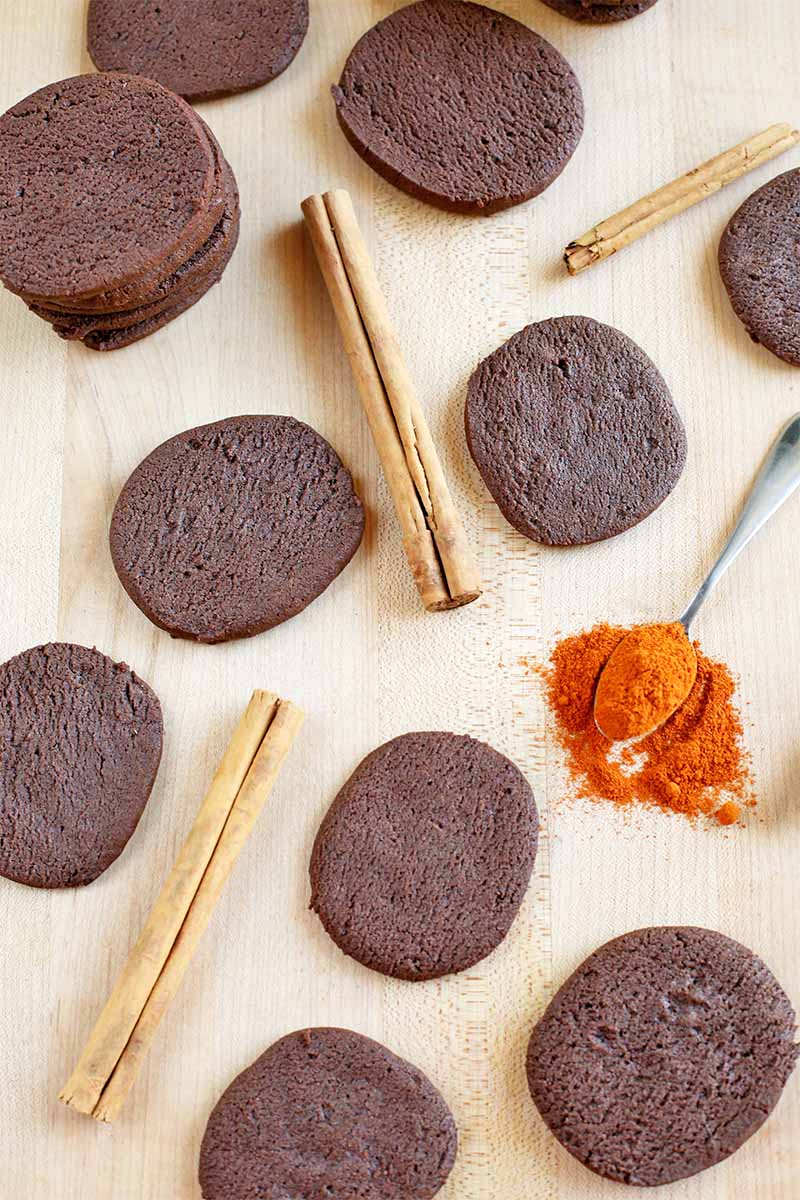
First, the cocoa and cinnamon hit your taste buds with a familiar flavor, followed by a little spicy kick thanks to the cayenne. It’s what makes these particular cookies so fantastic.
As you well know, the season of baking is upon us, and for me that means one thing: Easy dessert recipes.
As much as I love baking, I want to keep it as simple as possible so I can continue to enjoy baking throughout the coming months.
With so many things to celebrate, we wouldn’t want to wear out the oven too quickly, now would we?
This is one recipe that I will continue to pull out throughout the holidays, because it is a slice-n-bake cookie.
Slice-n-bake is the one kind of cookie recipe that I like to keep in my back pocket at all times. It’s just like baking that log of cookie dough that you can buy pre-made at the store, except these are made completely from scratch, with real ingredients, and no artificial dyes or preservatives.
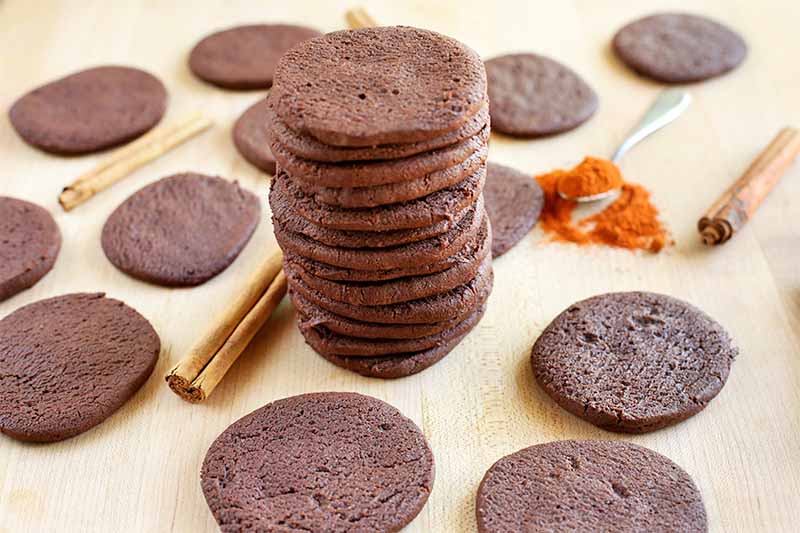
The dough is a breeze to put together, and the most time consuming step is to simply chill the dough before baking. You roll the dough into a log, and once it’s cold, it’s easy to slice and arrange on prepared baking sheets.
Plus, since the dough is easy to wrap and store, it won’t take up too much space in the refrigerator. Instead, it’s just a small 10-inch log that can conveniently be placed on a shelf to chill.
All things considered, that’s pretty easy.
You can even freeze this dough for up to two months, keeping it available to use as desired whenever you would like freshly baked cookies. It’s ideal for celebrating the upcoming Día de los Muertos festivities, as well as keeping on deck for Santa when Christmas rolls around.
Print
Mexican Hot Chocolate Cookies
- Total Time: 34 minutes
- Yield: 2 1/2 Dozen Cookies 1x
Description
Rich, spicy Mexican hot chocolate cookies are the slice-n-bake treat you won’t be able to resist. And you can freeze the dough for later use.
Ingredients
- 1 cup all-purpose flour
- 1/2 cup plus 1 Tbsp unsweetened cocoa powder
- 1/4 tsp baking soda
- 1/4 tsp salt
- 1/2 cup plus 1 Tbsp packed light brown sugar
- 1/2 cup plus 1 Tbsp granulated sugar
- 4 Tbsp unsalted butter, slightly softened
- 2 Tbsp coconut oil
- 1/2 tsp ground cinnamon
- 1/4 tsp ground cayenne pepper
- 1 tsp pure vanilla extract
- 1 large egg
Instructions
- Sift the flour, cocoa, baking soda, and salt together in a medium bowl.
- Sift the sugars together into a separate medium bowl, and remove any hard lumps.
- In the bowl of a stand mixer, beat butter and coconut oil until creamy with the paddle attachment on medium speed.
- Add sugar mixture, cinnamon, cayenne, and vanilla. Beat on high speed for about one minute. Then beat in the egg.
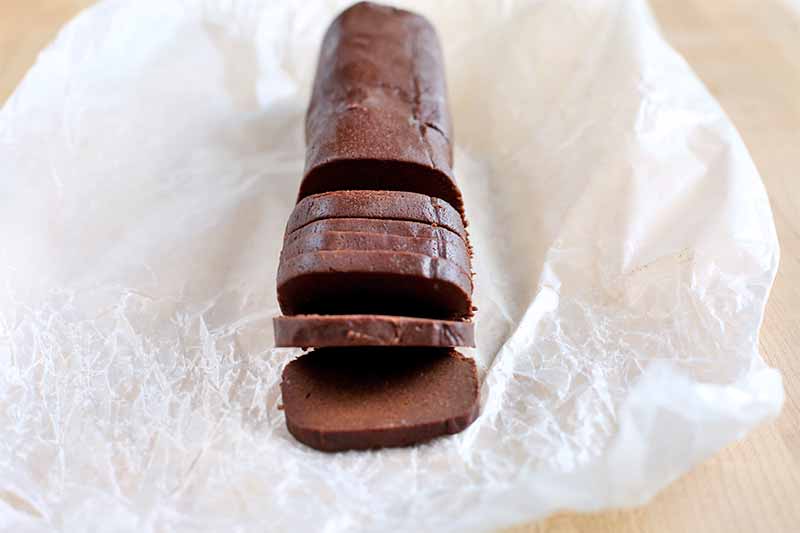
- Add the flour mixture. Beat on low speed just until incorporated. Gather the dough together with your hands and form it into a neat 9- to 10-inch log.
- Wrap in waxed paper. Fold or twist ends of paper without pinching or flattening the log.
- Chill at least 45 minutes, or until needed. Place oven racks in the upper and lower third of the oven and preheat to 350°F.
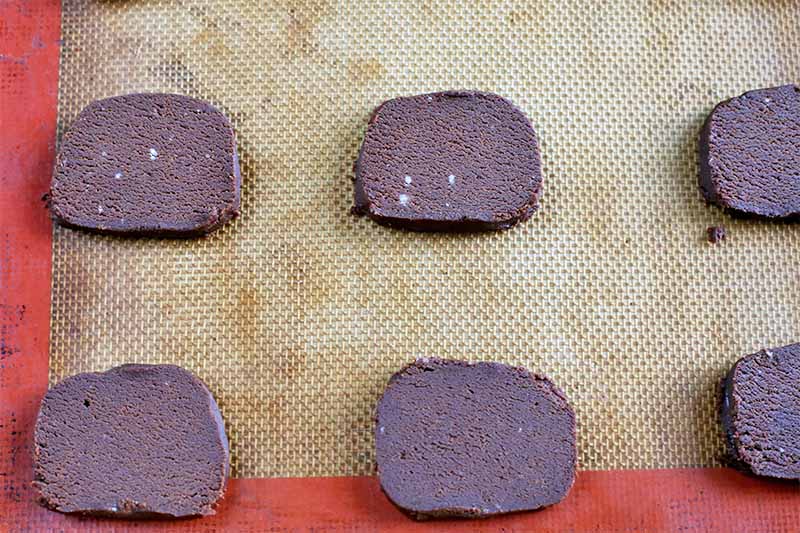
- Line two cookie sheets with parchment paper or a silicone mat. Use a sharp knife to slice rounds of chilled dough that are a scant 1/4 inch thick.
- Place 1 inch apart on prepared baking sheets. Bake for 12-14 minutes.
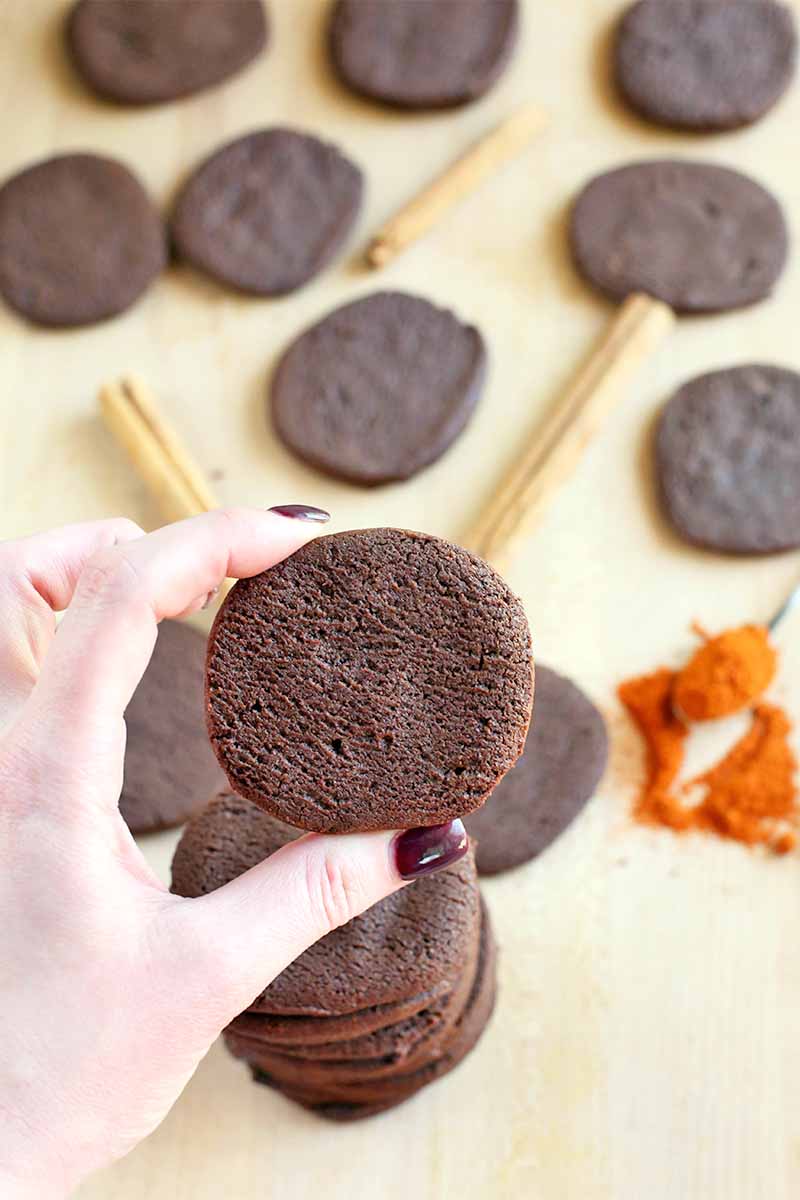
- Cookies will puff and crackle on top, and then begin to settle down slightly when done. Use a metal spatula to transfer cookies to a wire rack to cool.
- Cool completely before storing or stacking. Store in an airtight container for up to 2 weeks, or freeze for up to 2 months.
- Prep Time: 20 minutes
- Cook Time: 14 minutes
- Category: Cooking
- Method: Baking
- Cuisine: Dessert
Keywords: Halloween, dia de muertos, chocolate, cookie, spicy
Cooking By the Numbers…
Step 1 – Soften Butter and Measure Remaining Ingredients
Set the butter out at room temperature until softened, approximately 30 minutes.
If you want to save time, you can use the microwave for 10 seconds at 10% power. You may need a couple more seconds, depending on your microwave, or if your butter is frozen.
Measure all remaining ingredients as they are listed in the ingredients list.
Step 2 – Combine Dry Ingredients
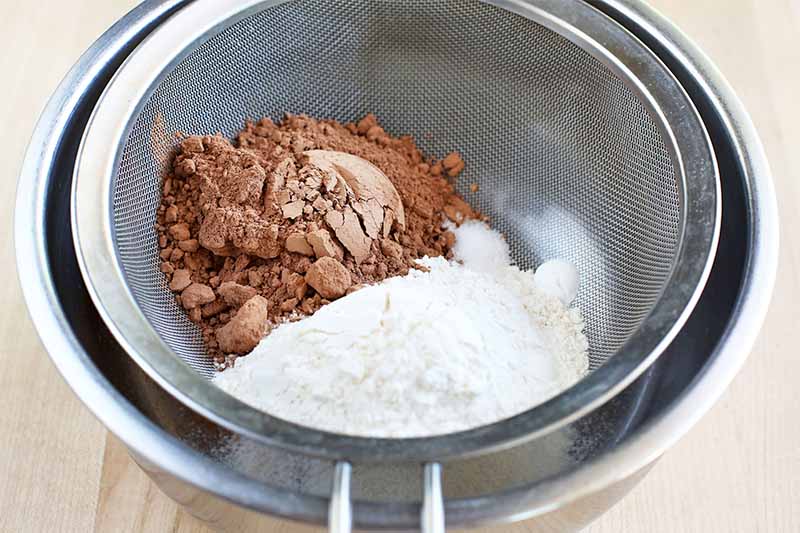
Sift together the flour, cocoa powder, baking soda, and salt in a medium bowl.
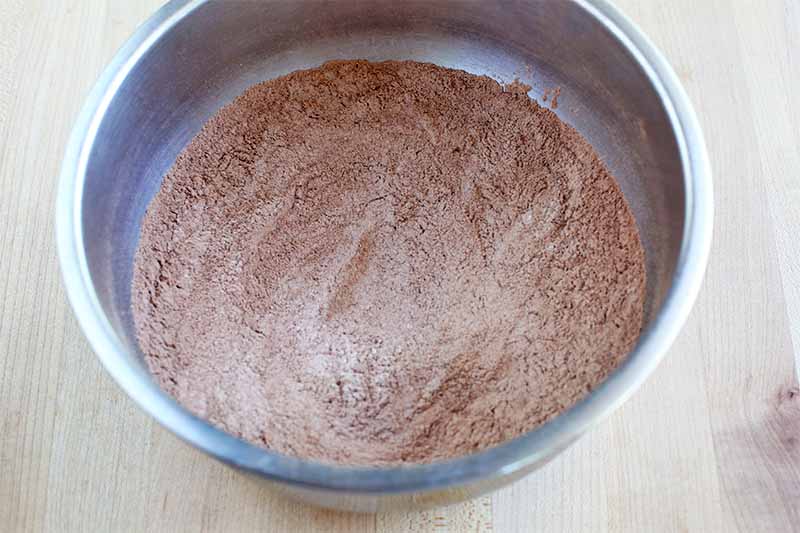
Whisk to combine. Set aside.

In a separate medium bowl, sift together the sugars, remove any hard lumps if you find them, and whisk to combine.
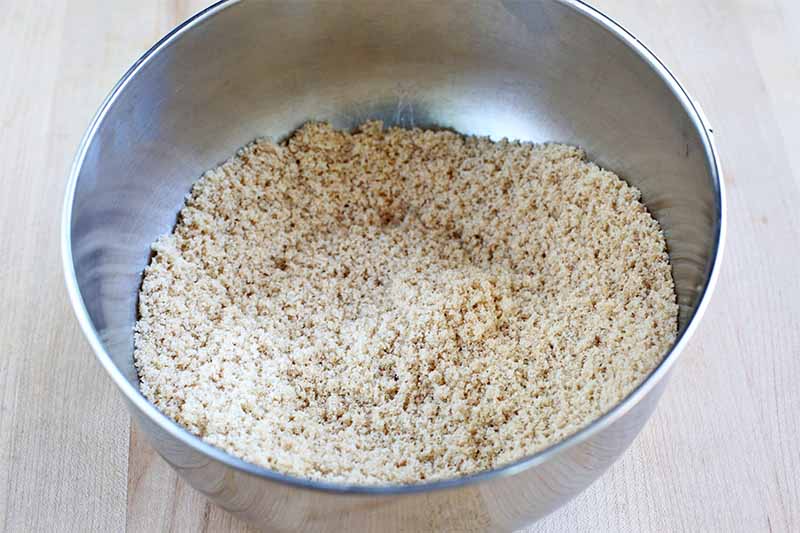
Set aside.
Step 3 – Make Batter
Add the softened butter and coconut oil to the bowl of a stand mixer.
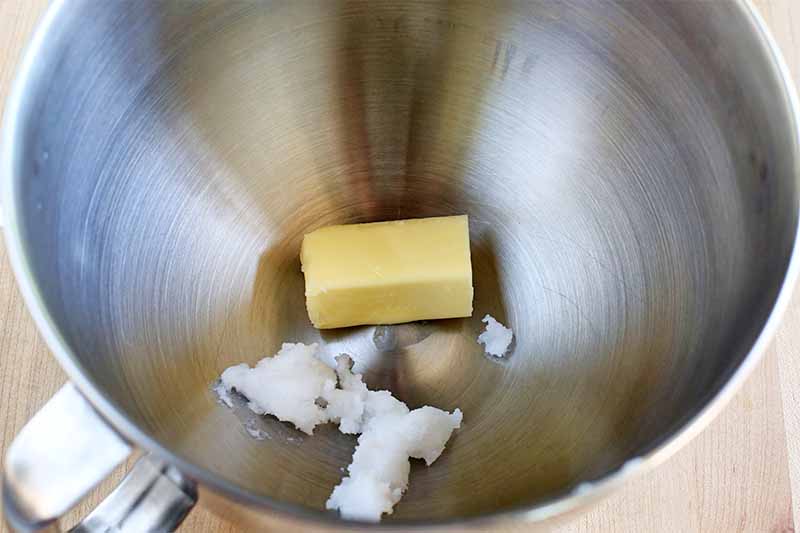
Beat with the paddle attachment on medium speed until the mixture is creamy.
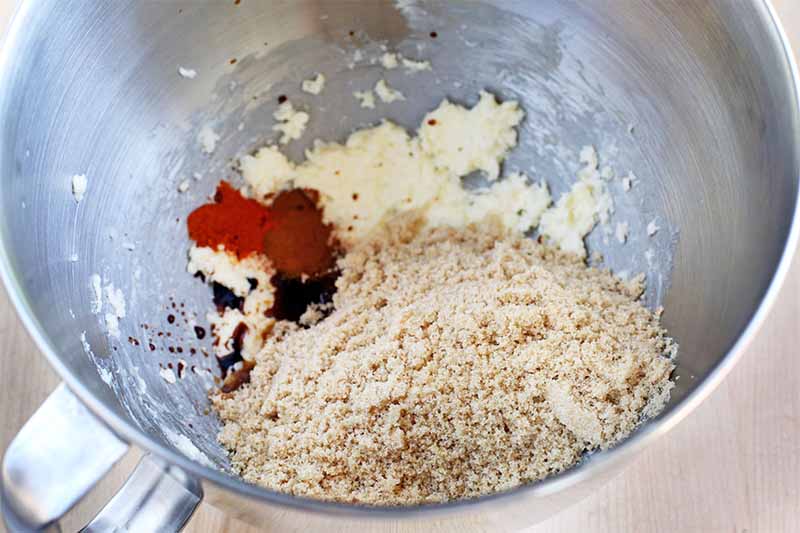
Add the sifted sugars, cinnamon, cayenne, and vanilla. Beat on high speed for about one minute until well combined.
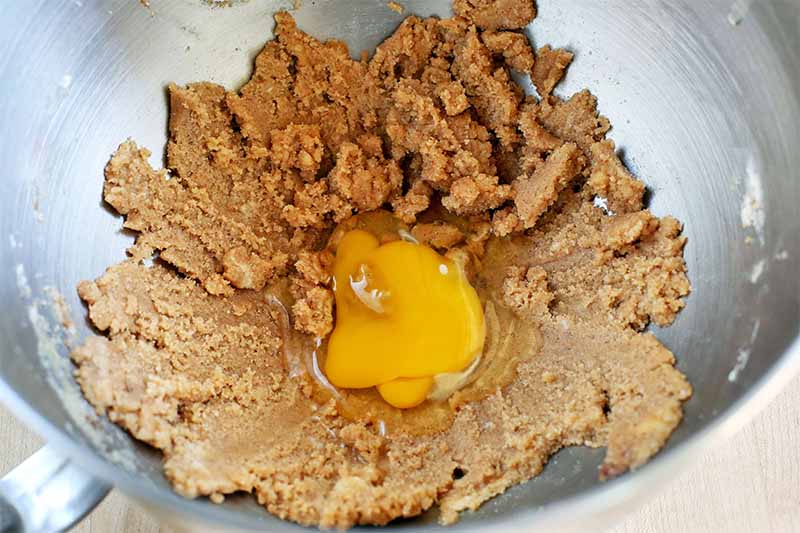
Add the egg and beat until combined.

Add all of the flour mixture. Beat on low speed until the flour is just incorporated, to form a somewhat stiff dough.
Step 4 – Chill Dough
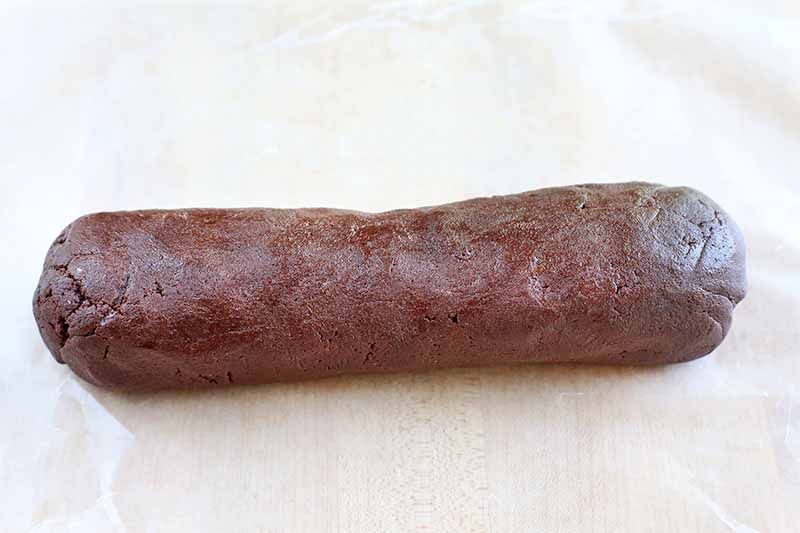
Remove the dough from the mixer and form it into a 9- to 10-inch log.
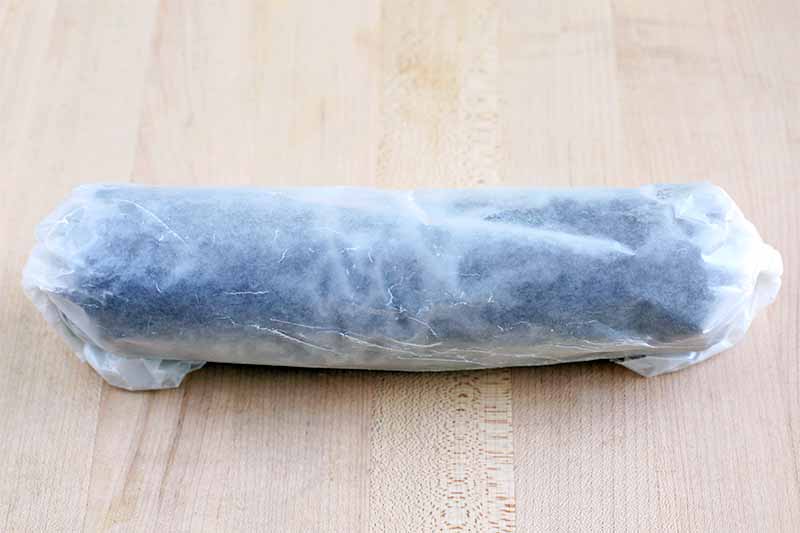
Wrap the dough in waxed paper and twist the ends together, making sure you don’t pinch or flatten the dough in the process.
Chill for at least 45 minutes, or until needed.
If you would like to freeze the cookie dough for use at a later time, place it in a zip-top freezer bag after wrapping in waxed paper. Remove as much air from the bag as possible.
You can freeze it this way for up to 3 months. Try to keep it on top of the other items in your freezer, so you won’t accidentally flatten it like I did (just a little!).
When you are ready to bake, unwrap the dough and leave it on the counter to defrost for 10-15 minutes before slicing.
Step 5 – Bake
When you’re ready to bake, place your oven racks in the upper and lower third of the oven. Preheat the oven to 350°F.
Line two cookie sheets with parchment paper or silicone mats. Use a sharp knife to cut the chilled dough into rounds that are 1/4 inch thick.
Place on the prepared baking sheets approximately 1 inch apart. Bake for 12-14 minutes.
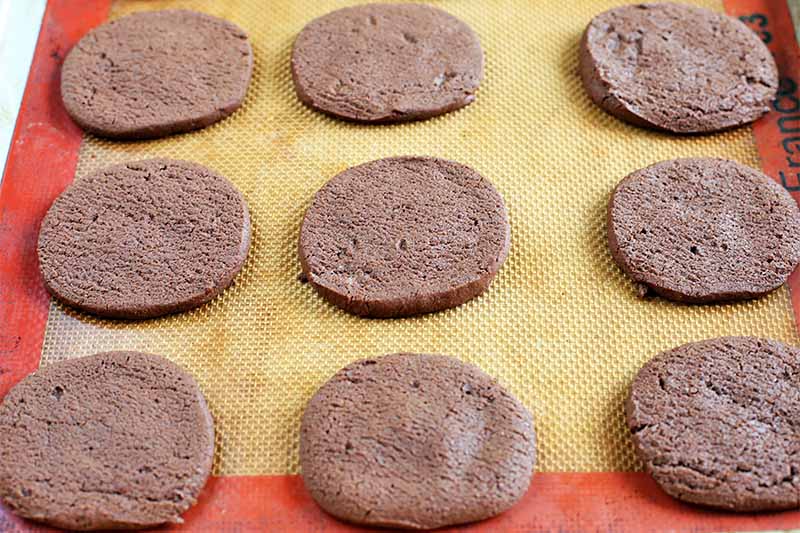
The cookies will puff and crackle on top, but then they will settle as they finish baking. Use a metal spatula to transfer the cookies to a wire rack to cool after removing the pans from the oven.
How to Store Slice-and-Bake Cookies
After the cookies have cooled off completely, you can choose to store them in a few different ways:
If you are planning to enjoy them over the next couple of weeks, store the cookies in an airtight container. These can be stored that way for up to two weeks.
If you want to freeze the cookies after you have baked them, store them as described above and place in the freezer for up to two months. Remove from the freezer and allow to thaw before enjoying them.
My advice is to pop them in the microwave for about 15-20 seconds so they get a little warm. Then, serve them with a big glass of cold milk or a warm mug of coffee. And for another rich and crisp chocolate treat, try this recipe, which can also be used to make ice cream sandwiches.
And for more of our favorite cookie recipes, take a look at some of these beauties:
- Classic Coconut Macaroons
- Traditional Madeleines
- Vanilla Spice Cookies
- Chocolate Raspberry Cream Sandwiches
- Spiced Spelt Flour Almond Wafers
When will you serve these tasty treats? Tell us in the comments below and be sure to rate this spicy recipe while you’re at it!
Photos by Meghan Yager, © Ask the Experts, LLC. ALL RIGHTS RESERVED. See our TOS for more details. Originally published by Shanna Mallon on April 20, 2011. Last updated: October 21, 2020 at 0:32 am. With additional writing and editing by Allison Sidhu.
Nutritional information derived from a database of known generic and branded foods and ingredients and was not compiled by a registered dietitian or submitted for lab testing. It should be viewed as an approximation.
About Meghan Yager
Meghan Yager is a food addict turned food and travel writer with a love for creating uncomplicated, gourmet recipes and devouring anything the world serves up. As the author of the food and travel blog Cake 'n Knife, Meghan focuses on unique foodie experiences from around the world to right at home in your own kitchen.