Being able to roast a chicken might just be my superpower, a special talent that I can confidently claim.

I feel like I know a lot of people who are talented, whether that means they’re naturally good with directions, they excel at playing an instrument after years of practice, or they have an innate ability to wear a lot of different hats.
I’m talking about those friends who can cook and play sports and play the piano and tell you which way is north, while also taking cool photographs or something.
Renaissance people, if you will.
I’ve never been mistaken for one of those. I mean, don’t get me wrong, I can do a lot of things moderately well.
I can bake cookies. I can read music. I can remember basic grammar rules.
But none of these things are really spectacular, to me. None of them make me go “Wow!” when I think about them.
Except this. Because here is the thing: when you can roast a chicken right, you will feel like a superstar.
In fact, as far as I can tell, there is nothing else quite like it.
There’s nothing, as far as I’m concerned, that will make you feel as successful, as capable, as victorious as this one simple act of culinary skill.
And as far as roast chickens go, I’ve loved other recipes before this one (this spatchcocked lemon version comes to mind) and I’m sure I’ll love others to come, but I doubt any that I adopt into my future cooking repertoire will be easier to prepare or offer a bigger payoff than this simple recipe.
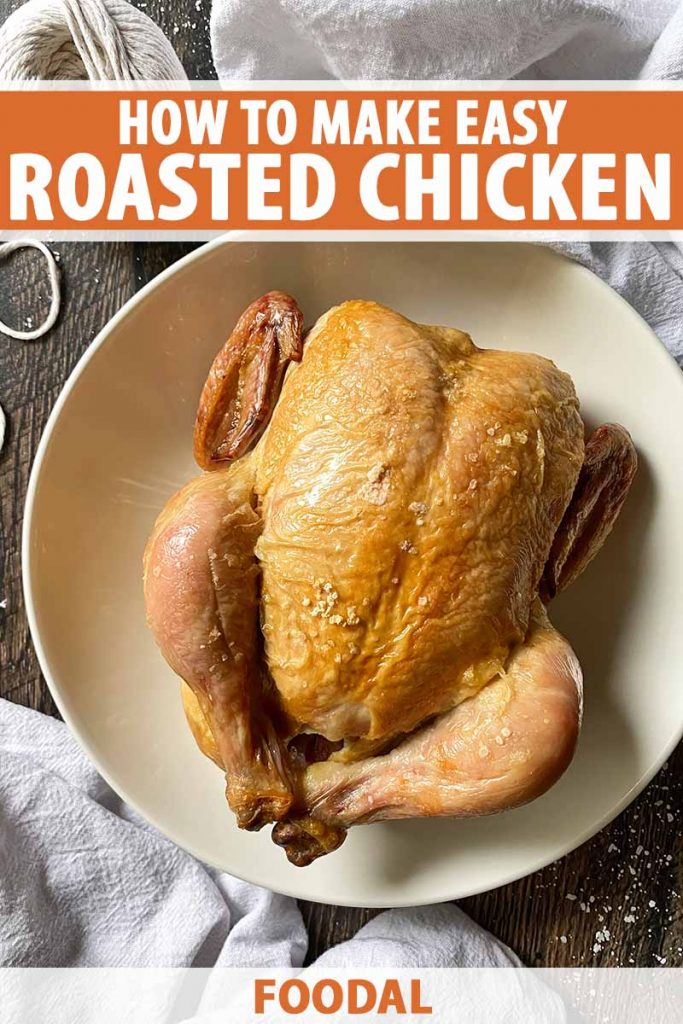
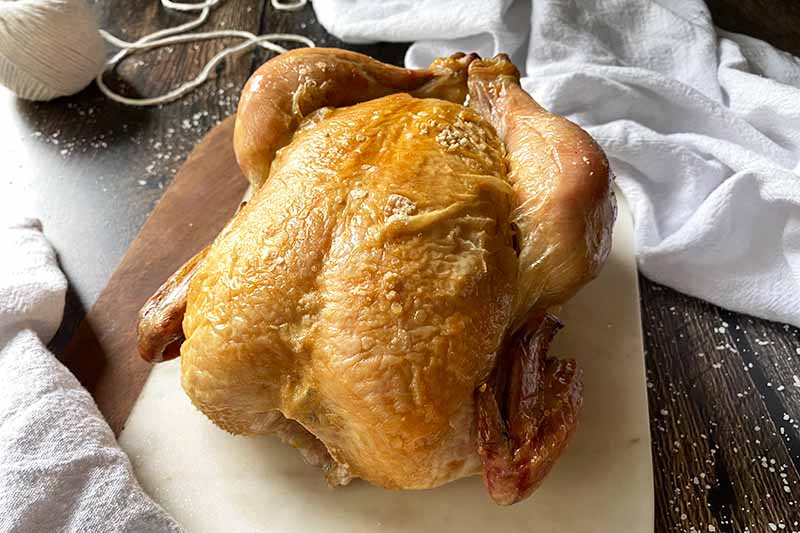
After just one hour of roasting time – and no turning or basting! – you’ll pull it out of the oven, all light golden brown, juicy, and shimmering with coarse salt, and carve tender slices to enjoy.

It will be easy to see you’ve made something that’s the very definition of spectacular.
It’s such a good feeling.
I really don’t know what else to say except this: do yourself a favor, and try this recipe sometime soon.
Impress yourself, especially if, as is the case for many of us, it’s one of the areas where you’re able to truly shine.
Print
Easy Roasted Chicken
- Total Time: 1 hour, 25 minutes
- Yield: 4 servings 1x
Description
An essential dish for the home cook to master, our easy roasted chicken is a showstopper, with juicy meat and crispy skin.
Ingredients
- 1 4-pound whole chicken
- 2 tablespoons olive, avocado, or canola oil
- 2 1/2 teaspoons coarse salt
- 2 cups water or low-sodium chicken stock, plus more as needed
- Kitchen twine, for trussing
Instructions
- Preheat oven to 425°F.
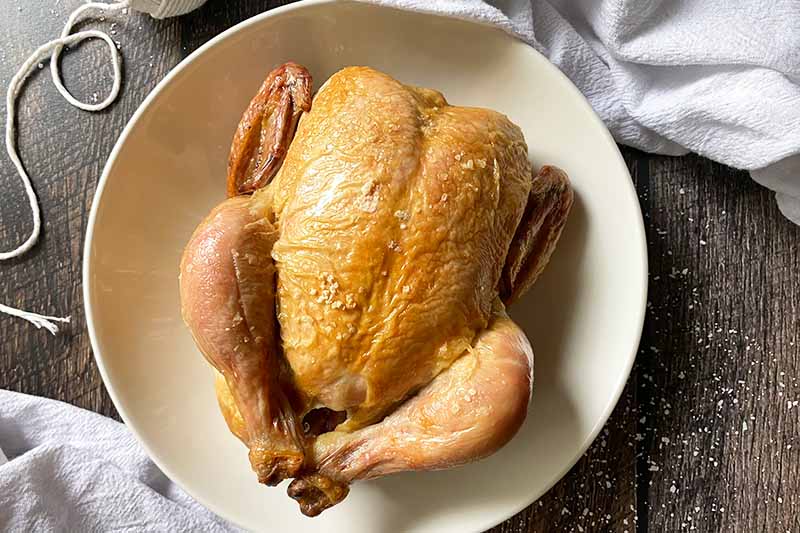
- Remove giblets and rinse chicken well. Using a paper towel, pat the inside and outside of the chicken dry.
- Rub oil all over the skin. Liberally salt the inside and outside of the bird.
- Truss the legs with kitchen twine and place chicken breast-side up on a rack set into a roasting pan. Add 2 cups water or chicken stock to the bottom of the pan.
- Roast for 1 hour, or until the thickest part of an inner thigh registers 160-165°F. If the water has evaporated throughout the cooking process, pour more into the pan as needed.
- Remove from oven and transfer to a cutting board. Let rest for 15 minutes before carving. Make a pan sauce from the drippings, if desired.
- Prep Time: 10 minutes
- Cook Time: 1 hour
- Category: Chicken
- Method: Roasting
- Cuisine: Poultry
Keywords: chicken, roasted
Cooking By the Numbers…
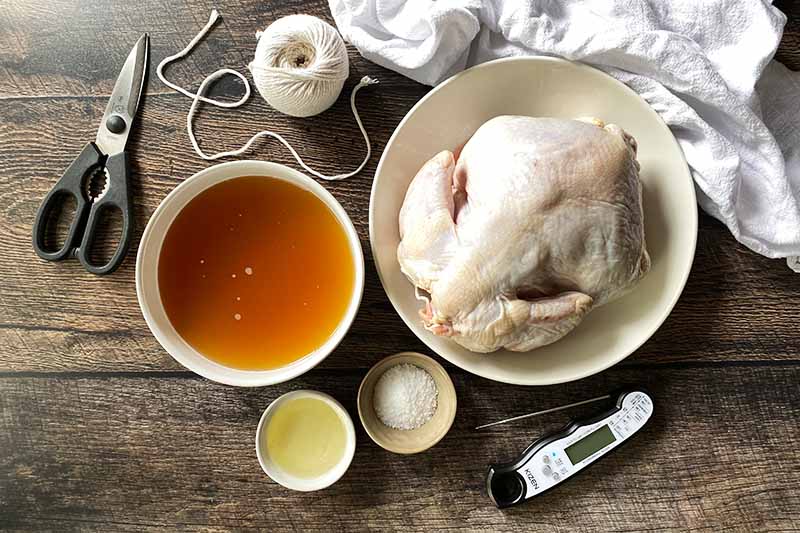
Step 1 – Preheat Oven and Set Out Ingredients and Kitchen Tools
Preheat your oven to 425°F.
Remove the chicken from the fridge. I started with a refrigerated chicken, and that’s what you should use to make this recipe.
If yours is frozen, be sure to defrost it completely in the fridge before you get started. Keep in mind that this will take about 24 hours, sometimes more if you choose to cook a larger bird, or if the bottom shelf of your refrigerator is particularly cold.
Pour 2 tablespoons of oil into a small dish, and measure your salt into another small dish. Any type of vegetable oil with a high smoke point will work well for roasting, and coarse salt is best for this recipe.
Cut a piece of kitchen twine about one foot long.
Set out a knife, meat thermometer, and roasting pan with a roasting rack.
Notes:
- If you don’t have any kitchen twine you can use metal skewers instead, or skip trussing the chicken; however, the bird will not cook as evenly if you skip this step.
- A cast iron skillet can be used instead of a roasting pan. Place the skillet in the oven while it preheats, and be sure to select one that’s large enough to hold the bird without touching the edges of the pan. If you’re looking to buy a roasting pan, be sure to read our ultimate guide to choose the right one for you.
- Meat thermometers take the guesswork out of cooking meat and poultry. Check out our recommendations for which thermometer you should add to your collection of kitchen tools.
Once you have gathered all of the ingredients and tools you need, you can now prep the chicken.
Step 2 – Prep the Poultry
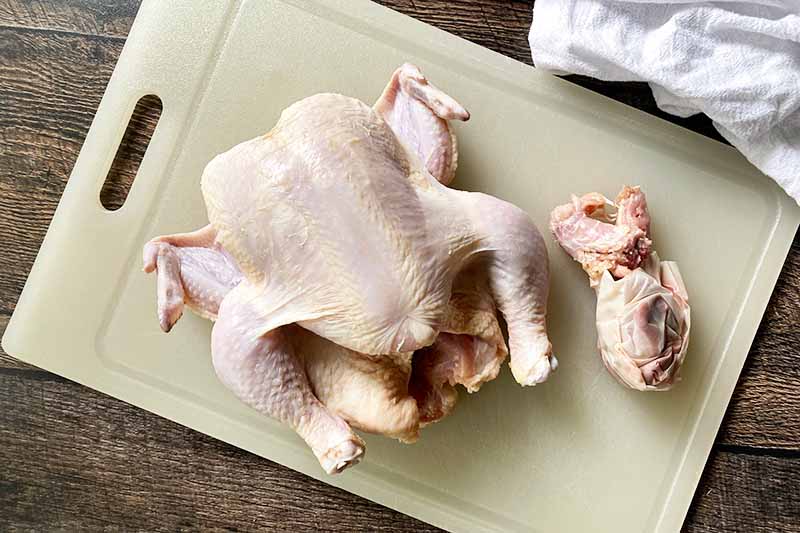
Remove the giblets from the chicken. These are usually found in a bag inside the cavity of the bird. You can save these to make a homemade stock or gravy, or simply throw them out.
Next, under cool running water, rinse chicken inside and out. I like to keep a colander in the sink in case the chicken slips from my hands.
Pat the inside and outside dry using clean paper towels, and set the chicken on a cutting board.
This is something that I’ve always done in my family, but the USDA actually does not recommend washing raw poultry before cooking. For food safety reasons, this makes sense – raw poultry juices that are potentially contaminated with bacteria can spread around your kitchen, causing cross-contamination of your sink, countertops, and cooking implements. If you choose to skip this step, that’s just fine!
Any salmonella or other bacteria that’s present in the poultry that you’ve purchased will be destroyed during cooking, as long as the meat reaches the recommended minimum temperature.
Be sure to keep food safety in mind, and clean your hands as well as any surfaces or kitchen implements that have come into contact with raw poultry well, with warm, soapy water or sanitizing spray.
Step 3 – Oil and Season
Lightly oil the chicken inside and out, using a basting brush or a paper towel.
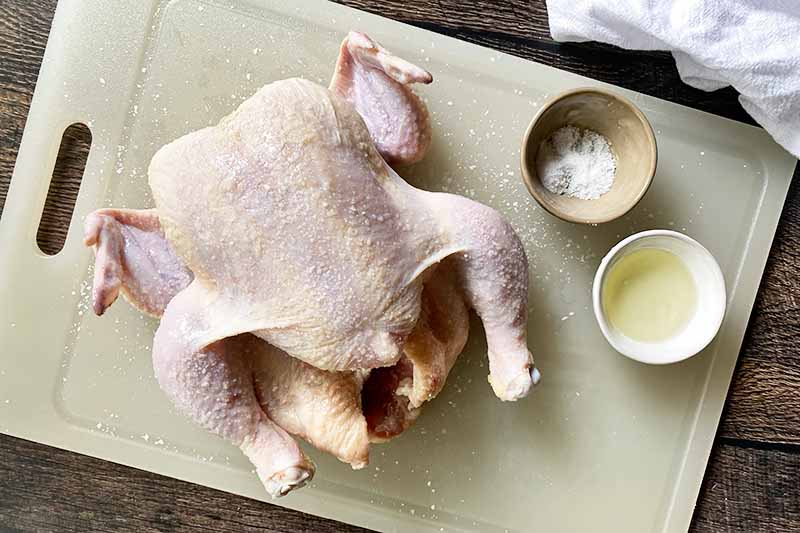
To season, grab a big pinch of the salt that you measured out, and let the salt “rain” down from your fingers onto the chicken. This will help to distribute it evenly. Don’t forget to season it inside as well.
Looking to jazz up this roasted chicken a bit? It’s delicious as is, but there are countless ways to add flavor to oven-roasted poultry. Here are a few of my favorites:
- For a smoky flavor, combine smoked paprika, ground cumin, and dried sage or thyme with the salt.
- For a more classic roast, stuff the cavity of the bird with garlic cloves, lemon wedges, and fresh herbs. Season the skin with coarse salt and freshly ground black pepper.
- Try our go-to dry rub for chicken to help seal in moisture while adding a punch of flavor from dried herbs, ground spices, and brown sugar.
With your seasonings chosen and spread all over your bird, let’s truss!
Step 4 – Truss
Place the chicken breast-side up on a cutting board, with the legs pointing towards you.
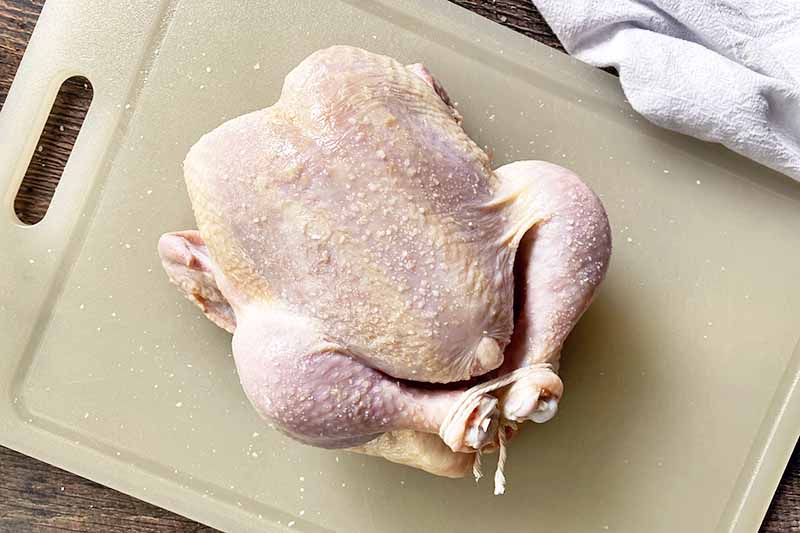
Fold the wings back, and tuck the tips under.
Center the twine under the legs and pull up, crossing the twine to make an X. Wrap the twine around and under the legs again, tightly pulling the legs together. Tie a tight knot underneath the legs.
Place the trussed chicken on top of the rack set into your roasting pan. Make sure it’s centered, without any parts touching the edges of the pan.
Sure, this sounds a bit complicated when you explain it in words. But the photos help, don’t they?
Granted, this may take a few tries before you get it just right, and raw poultry is slippery. But with a little bit of practice, you’ll be a trussing pro in no time.
As I mentioned before, you can skip the step. But I recommended it, if your goal is to make the juiciest, most evenly cooked roasted chicken possible.
Trussing holds the wings and drumsticks taut against the sides of the bird, helping to maintain its shape while cooking. Keeping everything held together tightly also helps to prevent the legs and wings from drying out.
Step 5 – Roast
Add 2 cups of water or chicken stock to the bottom of the roasting pan. This is particularly important when you’re roasting on a rack if you want to make a pan sauce after the bird is cooked.
Not only will the chicken lose some of its own liquids during the cooking process, if the pan is completely dry, whatever falls into it will burn off during roasting unless there’s some added moisture there.
Additional liquid also comes in handy if you plan to baste your bird. The choice there is up to you, as I’ll explain later. But it isn’t necessary with this recipe.
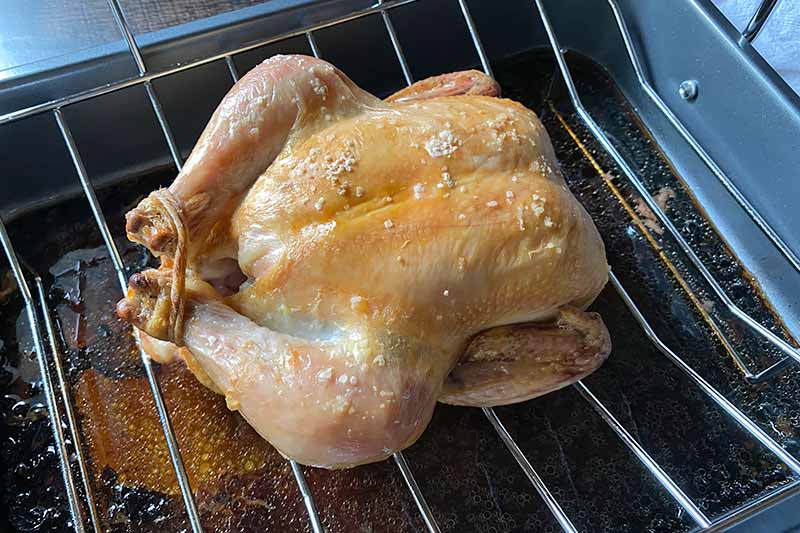
Place your roasting pan in the center of the oven and roast for 1 hour, or until the thickest part of an inner thigh registers between 160 and 165°F on a meat thermometer without touching the bone.
Does your bird have one of those little plastic button timers in it that pops out to let you know when it’s done? Ignore that.
More commonly found in whole turkeys and inserted by the manufacturer, you don’t need to take it out before cooking, but these little contraptions sometimes fail. A meat thermometer still serves as your best indicator of whether your roast chicken (or turkey) is done.
That’s it – no fiddling, no flipping, no basting, no opening the oven door during cooking or any other types of adjustments are necessary with this simple recipe.
Having said that, you could baste.
If you like, to encourage more even browning of the skin, baste the bird with juices from the bottom of the pan – you can do this with your basting brush, a basting bulb if you have one (also known as a turkey baster), or a ladle or large spoon should suffice.
Scoop up the drippings and cover the surface of the bird with them once or twice, every 20 to 30 minutes during roasting.
Overall, I’ve found that this isn’t really necessary. It makes a negligible difference in the final outcome, and also serves to reduce your oven temperature every time you open the door, leading to a longer total cook time.
One final note: this recipe was designed for a 4-pound whole chicken. But what if you want to cook a bigger bird? A general rule of thumb to keep in mind is that whole poultry will take about 15 minutes per pound to roast at 425°F.
Feel free to adjust up or down accordingly, and be sure to rely on your meat thermometer rather than calling it done whenever the timer goes off. If you find that the skin is perfectly crispy but the meat is still underdone inside, tent the bird with foil for the remainder of the roasting time to avoid burning.
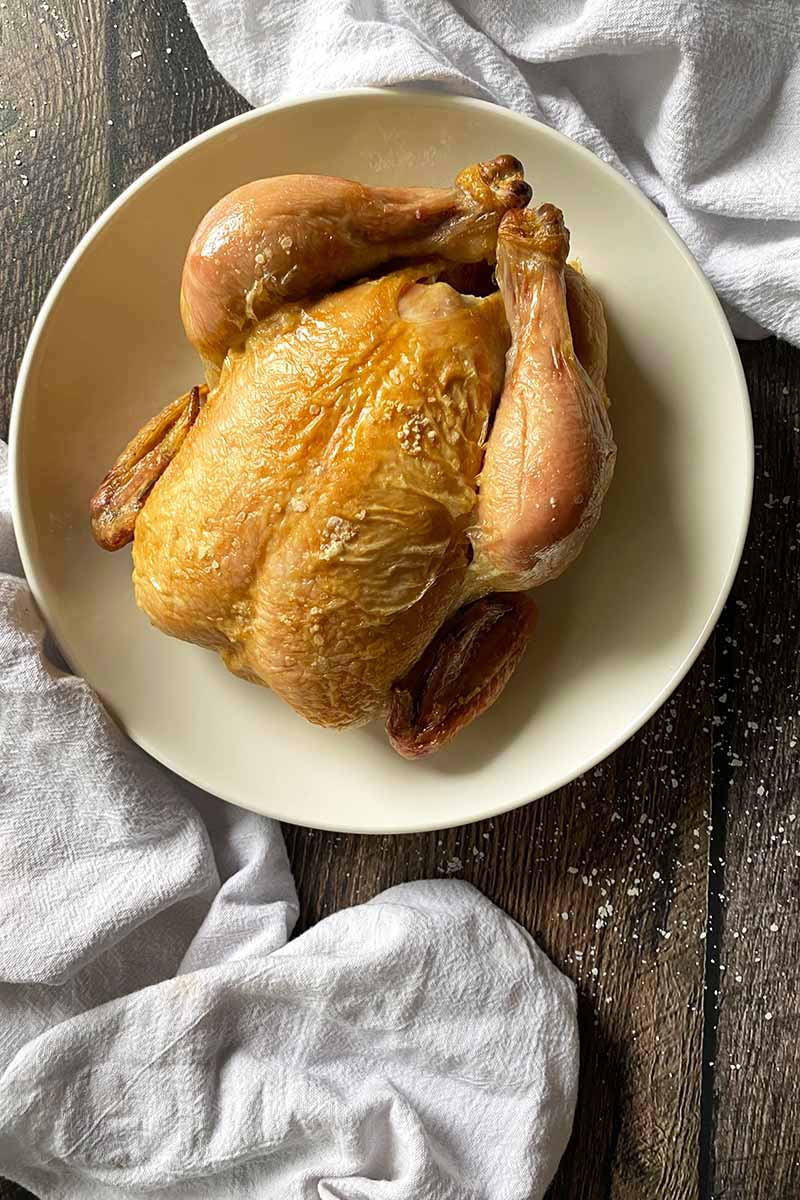
Step 6 – Remove from Oven and Rest
Remove the pan from the oven. Transfer the roasted chicken to a clean cutting or carving board, and allow it to rest for at least 15 minutes before carving.
This gives the protein time to relax and reabsorb moisture, resulting in perfectly juicy meat when you serve it. If you skip this rest period, most of those delicious juices will simply leak right out, all over your cutting board. This is a common cooking mistake that you can avoid!
If you like, while you wait, you can use the browned bits and juices that remain in the bottom of the roasting pan to make a gravy or pan sauce.
After you enjoy your dinner, you also have the option to save the bones to make your own soup or chicken stock.
A Delicious Dinner, with Fantastic Leftovers
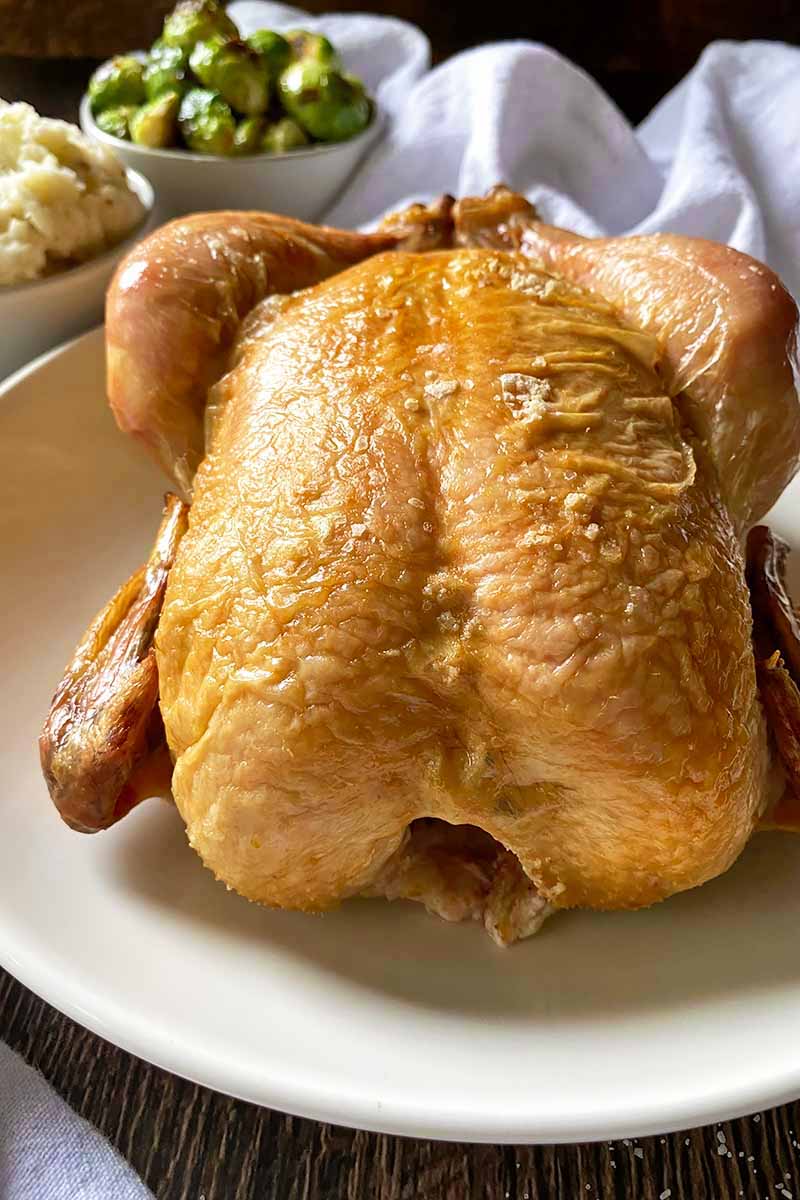
Now that your main course is taken care of, it’s time to pair this dish with a couple of your favorite sides and get to eating!
This truly is a recipe that I return to again and again. It’s easy to master, I feel confident in my skills every time I make it, and I love sitting down to every plateful of this wonderful creation.
You will, too.
I hope this method will help to boost your confidence in the kitchen, and that this dish will become a go-to favorite in your home.
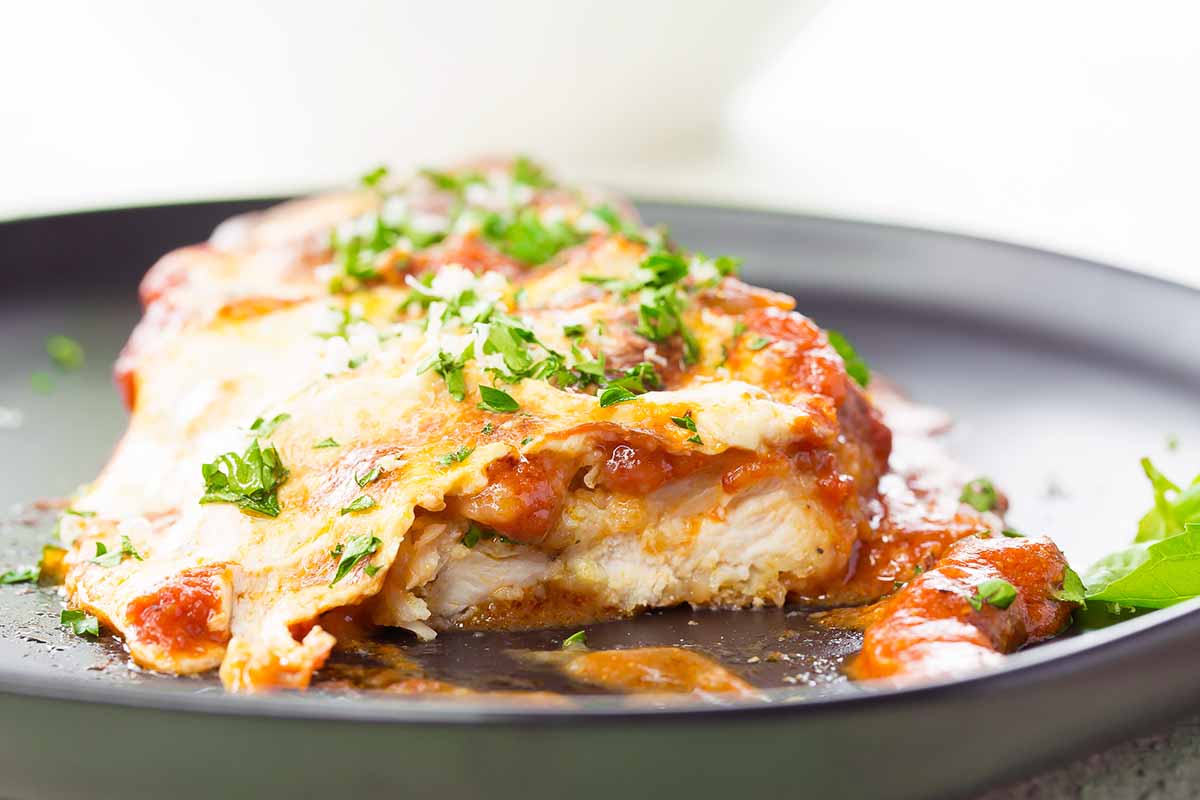
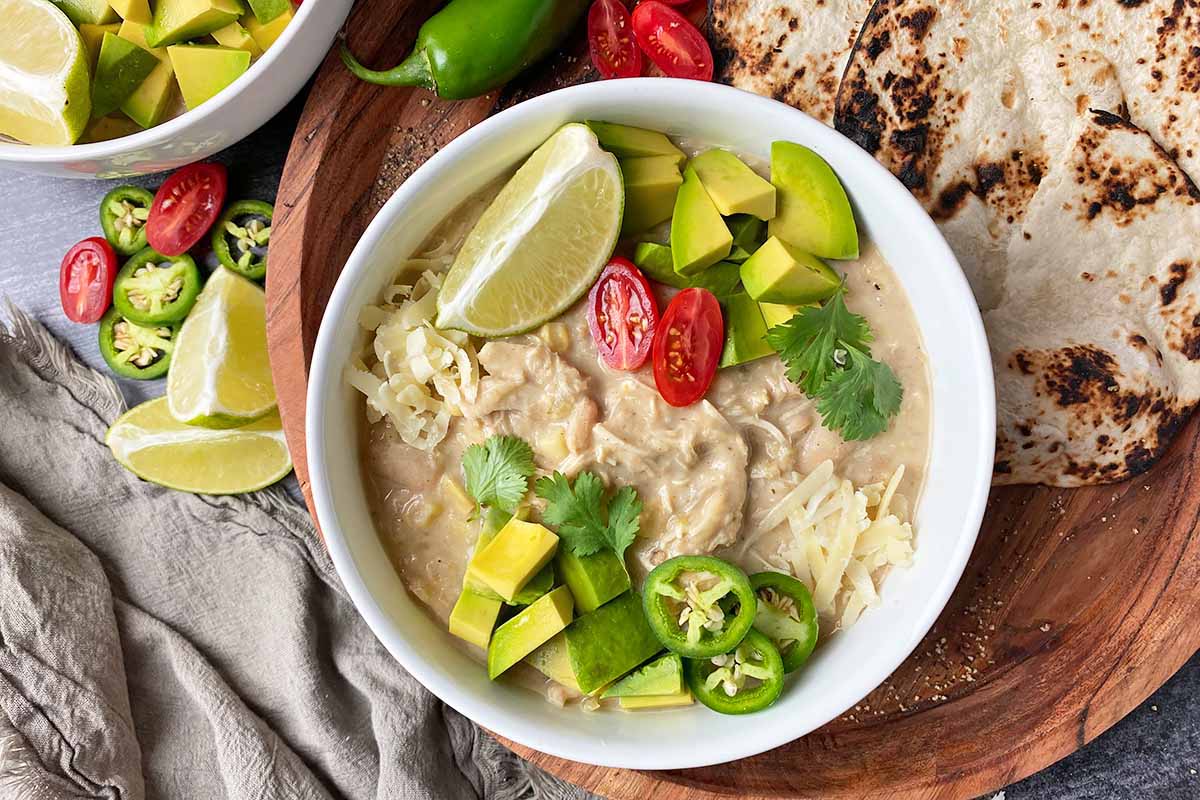
As delicious as roasted chicken is served alongside a healthy salad and a serving of creamy mashed potatoes, I always look forward to the leftovers as well.
Here are some of our favorite chicken recipes to put those to good use, in a salad form that’s perfect for topping leafy greens, enjoying between two slices of bread, or filling a tasty wrap:
What’s on your menu? Please share your favorite ways to season and enjoy roasted chicken in the comments below. And if you loved this simple recipe, let others know just how good it is by leaving a 5-star review!
Photos by Nikki Cervone, © Ask the Experts, LLC. ALL RIGHTS RESERVED. See our TOS for more details. Originally published by Shanna Mallon on April 23, 2010. Last updated on October 10, 2022. With additional writing and editing by Kelli McGrane and Allison Sidhu.
Nutritional information derived from a database of known generic and branded foods and ingredients and was not compiled by a registered dietitian or submitted for lab testing. It should be viewed as an approximation.
About Shanna Mallon
Shanna Mallon is a freelance writer who holds an MA in writing from DePaul University. Her work has been featured in a variety of media outlets, including The Kitchn, Better Homes & Gardens, Taste of Home, Houzz.com, Foodista, Entrepreneur, and Ragan PR. In 2014, she co-authored The Einkorn Cookbook with her husband, Tim. Today, you can find her digging into food topics and celebrating the everyday grace of eating on her blog, Go Eat Your Bread with Joy. Shanna lives in Nashville, Tennessee, with Tim and their two small kids.
Just curious if the 2 tbsp. of thyme is fresh or dried? I love a good roast chicken!
This has been my go-to roast chicken recipe too! I absolutely love it. 🙂
Ever since I first tried your roasted lemon chicken I’ve been roasting chicken about once a week. I’m excited to try this recipe at the higher temp so we can have roasted chicken even FASTER!
: D
BTW, I agree with you; roasting a lovely, moist, savory chicken is such a satisfying thing to do and the wows and oohs and MMMMmmmm’s makes it even more satisfying!
Sara – Good question! I will update the post to say this, but I used dried.
Carmen – Awesome! It’s really wonderful.
Kim – Right? And it is sooo easy to do when you don’t have to keep turning/basting/etc. Enjoy!
This is fancy enough for our FancyFriday carnival on lemons…today!! http://lovefeasttable.com/blog/fancy-friday-lemon-zest/
shanna. i am afraid of roasting a chicken. i think you know this. did i ever tell you my roast chicken fail? the bird never even made it to the oven. i think we’ll have to have a roast chicken date one of these days, in which you teach me the way.
and i don’t believe it’s the number of talents that one possesses, but the passion behind them that truly makes that talent come to life and wow others. and you wow me with every post! 🙂
What is extraordinary to one person is everyday to another, just remember. Many people never get closer to baking a cookie from scratch than Pillsbury slice and bakes! And I believe that many people would be wowed by something as “simple” (to you) as a roast chicken – given how little I cook or eat meat, it’s still something I’m a bit tentative with!
yes. i do love a good roasted chicken :)…looks lovely!
Weird. We’re cooking Thomas Keller’s whole chicken at my cooking class next weekend. Yet more evidence that we should be friends.
yum. i LOVE roast chicken!!!
The chicken looks so yummy! how about roasting a few veggies at the same time?
Look at you with that twine! Isn’t it amazing how just a little bit of spice, a whole chicken, and high heat are all you need to make alchemy happen? I’m planning to make chipotle roast chicken tacos tomorrow night, but you’re making me wish I’d done so a day early. 🙂
LoveFeastTable, I think this recipe would be great with lemons!
Jacqui, CANNOT WAIT for our chicken-roasting date on Wednesday!
Caitlin, Well that was a very nice, encouraging thing to say.
Rachel, Me too!
Kendra, Not should be. ARE. I was sold as soon as I knew you liked LOST and that was ages ago. Can’t wait to make this a real-life thing in June!
JessieV, I know! Me too.
Karen, Why not?
Maddie, Ha! Yes, yes, it is. One of those beautiful things in life.
Oh wow! I’ve never roasted a chicken before, and it has always been one of those daunting things that I just didn’t want to screw up. (This is the reason behind me not cooking other things, too, that could be too complicated.)
I want to try this now, and I think we might. This week!
Wow that chicken looks amazing! I cannot wait to try this. I’ve been thinking about doing a full chicken lately. what would you recommend for a side? Hmm, looks like I need some twine, where do you think I can find that? Yes, I’m full of questions today.
E.P. – You can do it! You can do it! Seriously.
Jessica, Thanks! Oh there are so many things you could have with this. Whatever you like! Maybe a potato (mashed? roasted? smashed?) and a vegetable (something green sounds good to me – roasted broccoli? green beans? a salad?). I’d love to hear what you do. Oh and good question about the twine. I feel like it must be at grocery stores but I have to look this week when I go buy some more. I’ll let you know where I find it!
I bought cooking twine on amazon, 1000ft for around 7.00 USD
Sigh. I’ve never roasted a chicken. Can you believe that?! Not only do I feel like kind of a lame food blogger, but sort of a lame cook. How can this be?! Recently bought Alice Waters’ The Art of Simple Food and she does a really nice entry on roasting chickens and how unbelievably easy it is. Then I see your post and –that’s it–I’m taking the little roasting chicken my mom gave me a few weeks ago out of the freezer. Love the idea that you can have leftovers in salad, enchiladas etc. Really pretty photos, too (tough to take a pretty photo of a raw chicken!–bravo)
I’ve seen this method mentioned before and am certainly curious – must try it next time I roast a chicken. I normally do butter, salt, pepper, juice from half a lemon and thyme and then put the other half of the lemon in the cavity but the ease and speed of your method certainly appeals!
Megan, I am already anticipating your sure success and cannot wait to read about it!
Gemma, Seriously it was the ease and speed that swung me over, too. I wonder what would happen if I took this method and added lemon and thyme? Maybe I shall try that next!
I roasted this chicken! I must say, I think it was the most moist I’ve ever roasted a chicken. I added some ‘magic spice’ from Martinique to the bird, gave it a little kick and I sort of tented halfway through.
Needless to say, it was delicious, so, thank you for sharing!
Whoops! I think our first comment was meant for your lemony post!! Now that we’ve stopped by again…we’ll add that your chicken looks wonderful. We think a roast chicken is awesome “fast food”! It cooks itself!! And, it is always like you say, impressive! Chris Ann & Kristin
I love your photos. The salted chicken…the kitchen string…the pan. Beautiful. I don’t roast chicken enough. Your writing and photos are very persuasive. 🙂
You’re a superstar in my book. Roasting a chicken is an absolutely vital skill. Give yourself a standing ovation. Looks fantastic!
I think you’re being a little too harsh on yourself – you’re a fantastic writer and photographer with a lovely, successful blog – what’s so unremarkable about that?? Plus, you make a killer roast chicken, reminds me that it’s about time I made it again 🙂
Jordan, I’m so glad!
LoveFeast Table, Ha! No problem. I love my lemony chicken recipe too, but this one wins for easiness. Thanks for the comments!
Tracy, Do it! Do it! And thank you for the encouragement!
Redmenace, Ha! Well thank you!
Danielle, You’re sweet. And I agree, it’s always a good time for roast chicken. Tonight, Jacqui and I made three.
Sometimes, when looking at all of the talented people around you, it is difficult to see your own talents. I’ve definitely had my moments where, surrounded by the musicians, scholars and athletes, I’ve felt mediocre. We all have our talents though, and our skills. People tend to be their own harshest critic. Don’t disparage yourself and forget your talents.
Everyone can roast a chicken, not everyone has the skills or the knowledge base to do it well.
Well, Dana, you are very gracious. Sometimes I may be my harshest critic, that’s true. But trust me when I say I’m such a big fan of myself too, that even when I am putting myself down, I still tend to think I’m pretty awesome. I’ve actually wondered if that’s why I don’t have big-time talents, you know? It’d go to my head, ha! Thank you for your sweet comment.
I am definitely going to try this!
Julie, I hope you love it!
i am happy to sat i am back after a hiatus from my kitchen and one of the first things i made was this roast chicken. shannalee…this really is one of the best recipes of yours i use over and over. its superb. thanks!
Jordan, That makes me so happy! Yay!
An hour, really?! The bird is still raw after 1.5 hours!!
I’m sorry to hear that, Tami! Are you sure your oven was at 450 and 375 degrees? And did you dry the bird thoroughly before salting it? I’ve used this recipe several times, and an hour really does do the trick.