
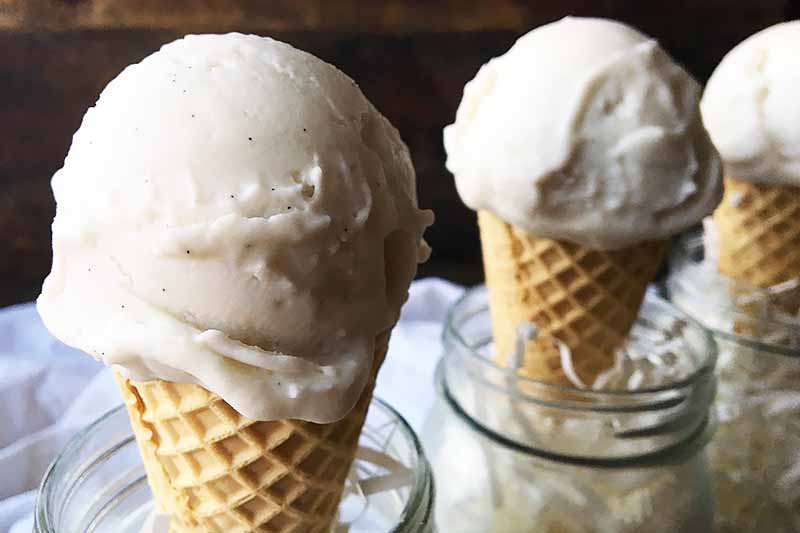
This luscious vanilla bean vegan ice cream is a personal homage to the delicious journey I’ve had with my careers in the food industry.

So far, I’ve had a pretty sweet background of jobs. Quite literally.
Cheesemonger, pastry cook, bread baker, donut maker, food writer…
I adore food. I love food. I’m obsessed with food.
Out of all of the jobs I’ve had the pleasure of working, one of my favorite – and sweetest – places of employment was at a vegan ice cream shop and cafe in Boston.
While there, I fully immersed myself in a variety of positions as a cake decorator, barista, ice cream scooper, and a pastry assistant.
We sold an awe-inspiring selection of delectable vegan pastries, cakes, smoothies, and espresso choices. Though I loved nibbling on gooey, chocoalty magic bars and crisp shortbread cookie sandwiches filled with luscious buttercream, my heart belonged entirely to the ice cream.
The thick, rich, velvety, vegan ice cream.
Every melting bite of their frozen treats, made with a coconut cream base, was so smooth and indulgent. Admittedly (sorry, bosses) I enjoyed more samples than we were allowed to have.
I certainly was not the only one.
Chocolate chip cookie dough, Earl Grey shortbread, dark chocolate, salted caramel, mint chocolate chip, sweet lavender…
It has by far been the best I’ve ever tasted, beating out any dairy-laden selections I’ve eaten. Anything from pumpkin spice to soft serve frozen yogurt pales in comparison.
I was at my happiest, and my most inspired, to be surrounded by the artisanal creations of the dedicated owners and my fellow employees.
Now that I’m living in Pittsburgh, I’ve had a massive craving for what I once enjoyed as part of my daily routine in Boston.
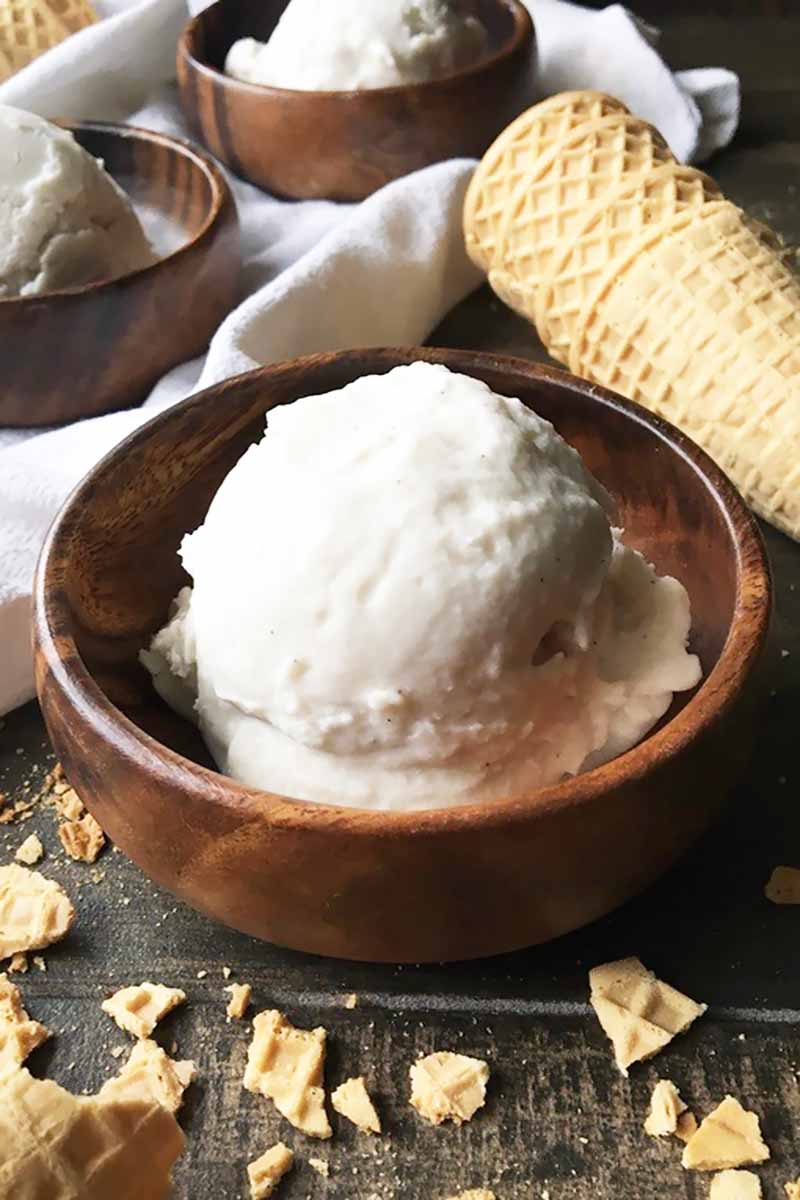
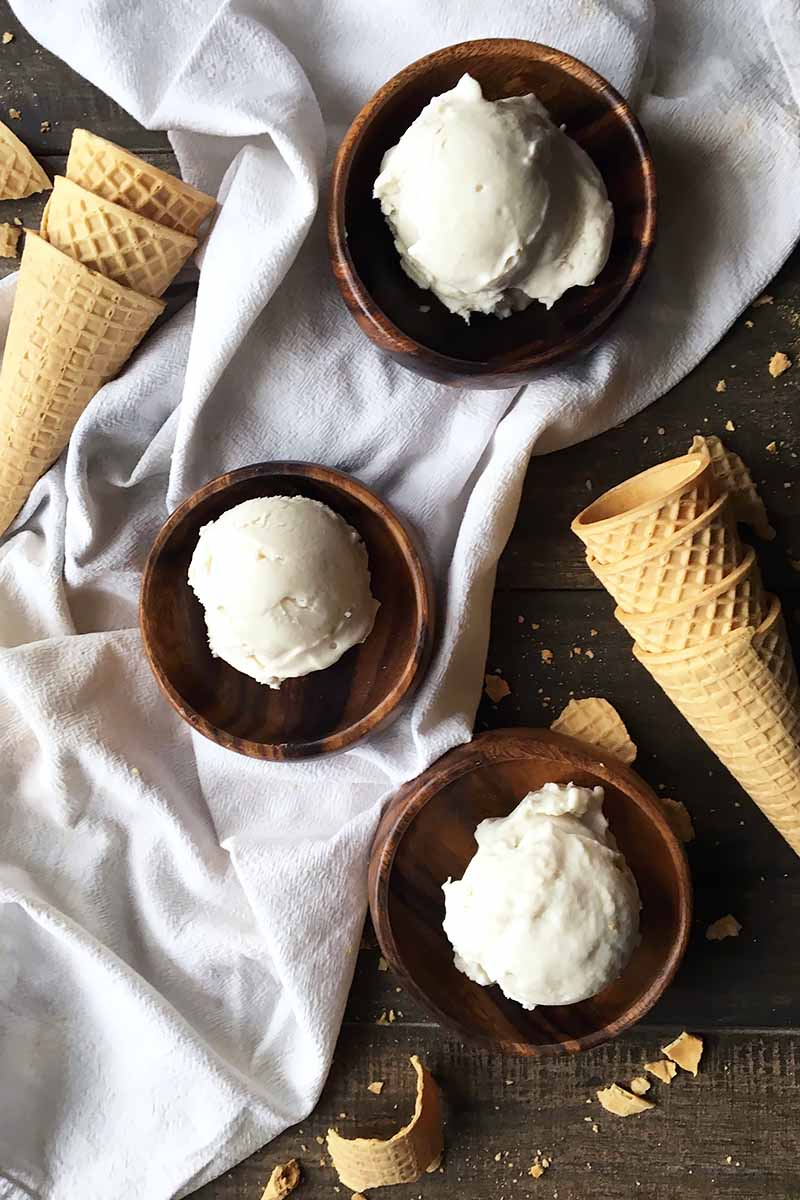
This simple, 6-ingredient vegan vanilla bean recipe, while nowhere near the perfection of my old job’s dessert, is a tasty version that is still pleasantly rich and luscious.
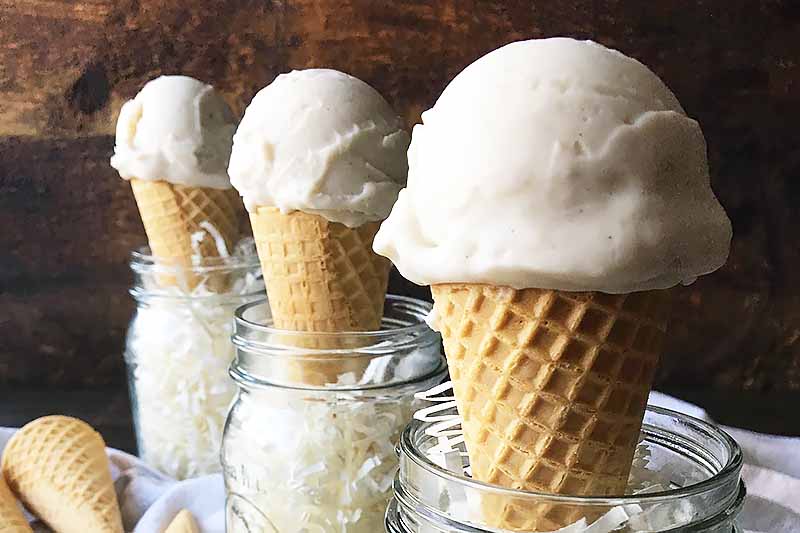
It’s an essential vegan dessert that you’ll want to master and learn by heart, to serve all summer long!
Print
Vegan Vanilla Bean Ice Cream
- Total Time: 6 hours, 40 minutes
- Yield: About 1 quart 1x
Description
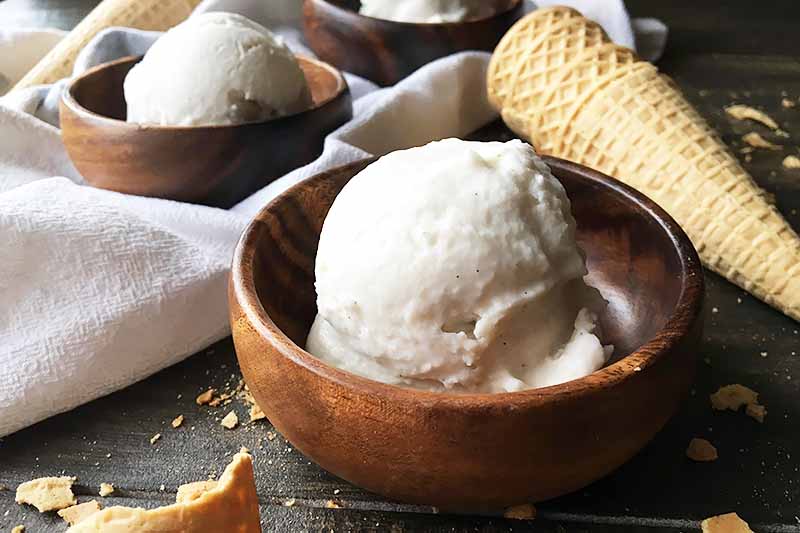
Finally, the perfect vegan vanilla ice cream you can make right at home. It’s rich, creamy, luscious, and only six ingredients.
Ingredients
- 2 13-ounce cans coconut cream
- 3/4 cup vegan granulated sugar
- 1/4 teaspoon kosher salt
- 1 tablespoon cornstarch
- 1/2 teaspoon vanilla extract
- seeds scraped from 1 vanilla bean
Instructions
- Prepare your ice cream maker according to the manufacturer’s directions.
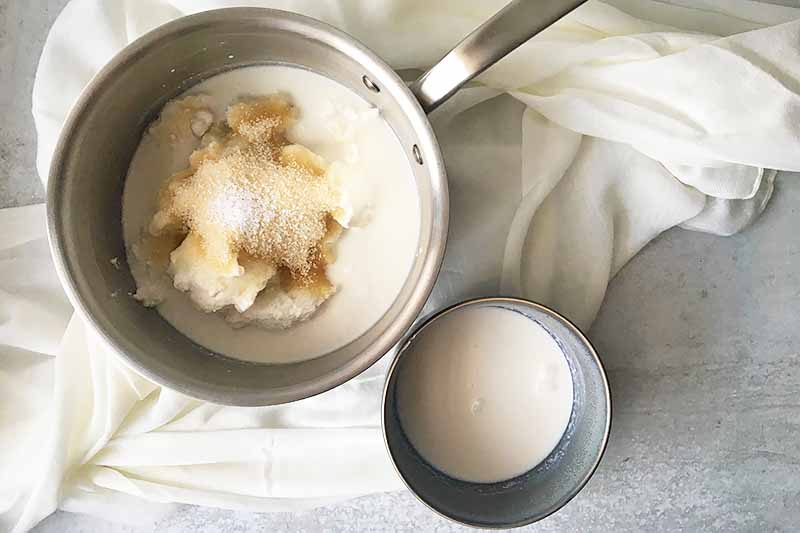
- Open the cans of coconut cream. Reserve about 1/2 cup of liquid from the coconut cream and place in a separate small bowl. Mix together the rest of the coconut cream, sugar, and salt in a 2-quart or 3-quart saucepan. The mixture will look lumpy.
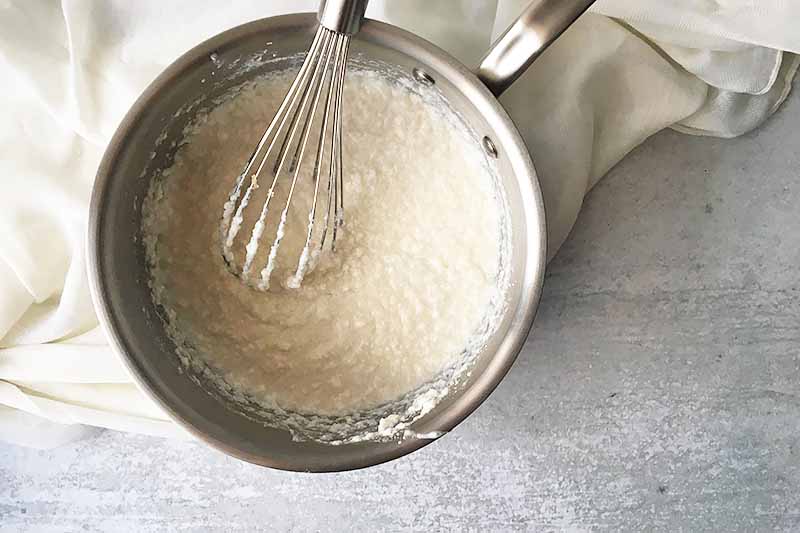
- Warm the mixture over medium-low heat, stirring occasionally, until the sugar has completely dissolved into the coconut cream and the mixture is smooth, about 2 minutes.
- Whisk the cornstarch into the bowl with the reserved 1/2 cup coconut liquid to make a smooth slurry.
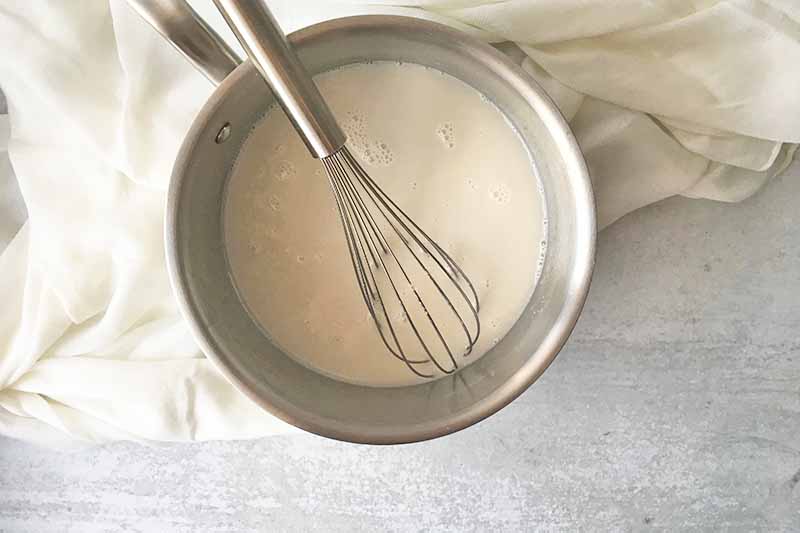
- While whisking constantly, gradually pour the cornstarch mixture into the warm coconut milk.
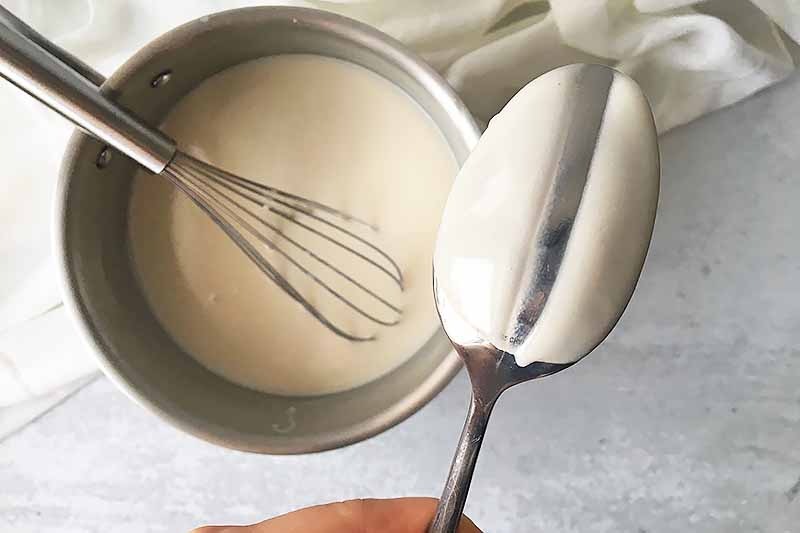
- Continue cooking on medium-low heat, stirring occasionally, until the base has thickened just enough to coat the back of a spoon, about 6 to 8 minutes. Do not overcook, and do not allow the base to come to a boil.
- Remove the base from the heat and stir in the vanilla and vanilla bean seeds.
- Transfer the mixture from the hot pot to a heatproof bowl. Let the base cool completely at room temperature, stirring occasionally. You can place the bowl over a bigger bowl of ice to make this process faster. Once it has cooled completely, transfer the mixture to an airtight container and refrigerate for at least 4 hours or for up to 1 day.
- When ready to churn, remove the base from the refrigerator and pour into the ice cream maker. Churn the ice cream until it thickens to about the consistency of soft-serve ice cream, about 10-25 minutes. Do not let it become entirely frozen.
- Transfer the ice cream into a clean airtight container. Place a piece of parchment or wax paper against the surface of the ice cream to prevent ice crystals. Seal the container with the lid, and freeze for about 2 hours to fully harden the ice cream.
- Serve with your favorite toppings!
- Prep Time: 30 minutes
- Cook Time: 10 minutes
- Category: Ice Cream
- Method: Ice Cream Maker
- Cuisine: Dessert
Keywords: vegan, vegetarian, ice cream, dessert, summer, coconut cream, cornstarch
Cooking by the Numbers…
Step 1 – Prep
Prepare your ice cream maker according to the manufacturer’s directions. If your model comes with a canister insert, make sure that your canister is frozen at least 24 hours prior to making the recipe.
Open the cans of coconut cream. The coconut cream in the can usually separates into two parts: the cream and the water. Reserve about 1/2 cup of the water from the coconut cream and place in a separate small bowl.
Measure out all of the other ingredients.
You can easily substitute 2 cans of coconut milk instead of coconut cream in the recipe. Or you can do half coconut milk and half coconut cream, depending on what you have. Either option will be slightly less thick and rich, but still 100% divine!
Step 2 – Mix Together the Base Ingredients
Mix together the rest of the coconut cream, granulated sugar, and salt in a 2-quart or 3-quart saucepan. The mixture will look lumpy. No worries, nothing bad has happened!
Step 3 – Heat the Mixture
Warm the mixture over medium-low heat, stirring occasionally with a whisk, until the sugar has completely dissolved and the mixture is completely smooth. This will take about two minutes.
See? All smooth!
Step 4 – Make the Slurry

A slurry is a mixture of a liquid and a thickening agent. This recipe uses a slurry of coconut water and cornstarch to thicken the base for a dense, rich final texture.
Whisk the cornstarch into the bowl of the reserved 1/2 cup coconut liquid until completely dissolved and smooth.
Step 5 – Add the Slurry and Thicken Base
While whisking constantly, gradually pour the cornstarch mixture into the warm coconut milk. Pouring the cornstarch mixture in all at once poses a risk of failing to create a homogenous mixture.
Continue cooking on medium-low heat, stirring occasionally until the base has thickened just enough to coat the back of a spoon, about 6 to 8 minutes.
Dip a spoon into the mixture, and run your finger through it. If the line remains there without the liquid quickly running back into it, you have cooked the base perfectly.
Do not overcook the mixture, and do not allow the base come to a boil. Both no-no’s will make the final product grainy. Keep the heat medium-low!
Step 6 – Add the Vanilla
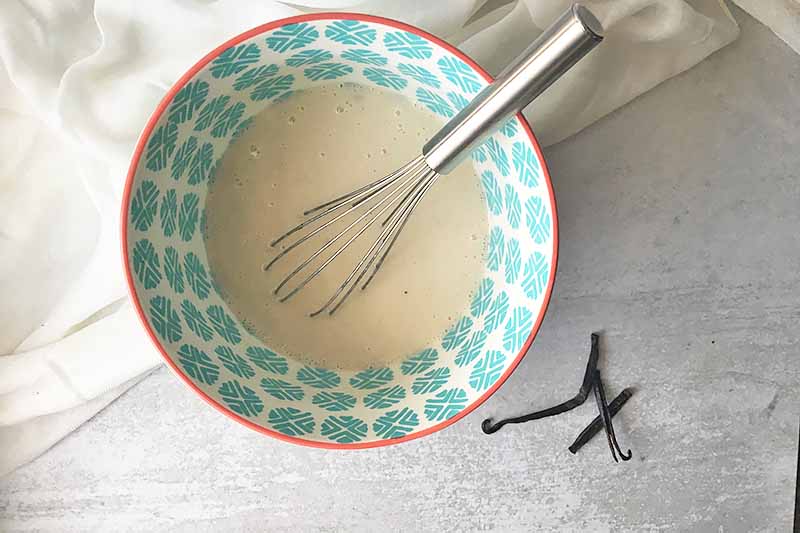
Remove the base from the heat and stir in the vanilla extract and vanilla bean seeds.
I like the mixture of vanilla extract and whole vanilla bean – double the amazing flavor! If the bean is not available, or is too expensive, increase the extract to 2 teaspoons.
Step 7 – Cool
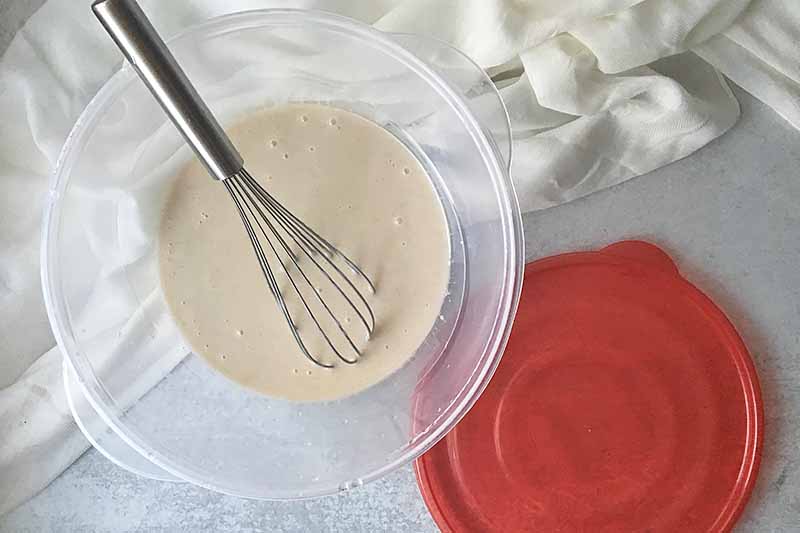
Transfer the mixture from the hot pot to a heatproof bowl. This will help cool the mixture down more quickly. Let the base cool completely at room temperature, stirring occasionally.
Want to quicken this step? You can place the bowl over a bigger bowl of ice cubes.
Once the base has cooled completely, transfer the mixture to an airtight container and refrigerate for at least 4 hours, or for up to 1 day.
The mixture will thicken to a pudding-like consistency: thick and creamy!
Step 8 – Churn
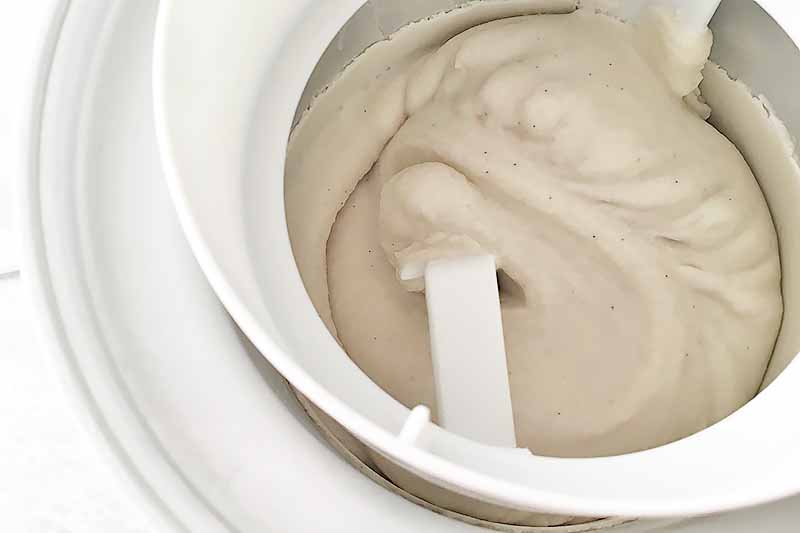
When ready to churn, remove the base from the refrigerator and pour into the prepared ice cream maker.
Churn the base until it thickens to about the consistency of soft-serve ice cream, about 10-25 minutes, depending on the make of your own machine.
At this point as it is churning, you have the option of mixing in any additional ingredients as it’s churning, like chocolate chips, coconut flakes, or fruit.
Don’t let it harden to the point of freezing – it will be difficult to remove from the canister.
Step 9 – Freeze Completely
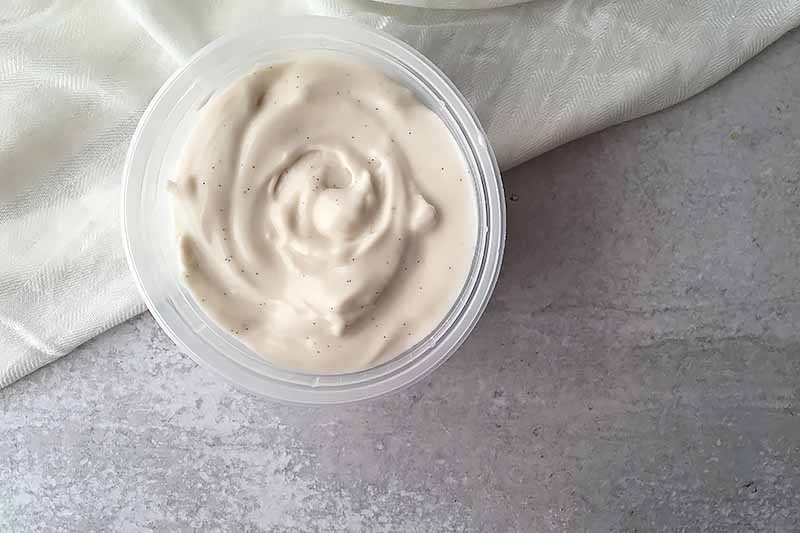
Transfer into a clean airtight container. Place a piece of parchment or wax paper against the surface of the dessert to prevent ice crystals from forming.
Seal the container with the lid, and freeze for about 2 hours to fully harden it.
Once frozen, serve as you wish!
Make It Yours: Adding Unique Flavors
My basic vegan vanilla ice cream is the best foundation, a clean slate for you to explore and experiment with adding flavors that will make it uniquely yours.
You can mix chocolate chips, cookie dough bites, or fruit into the churned base before you freeze it.
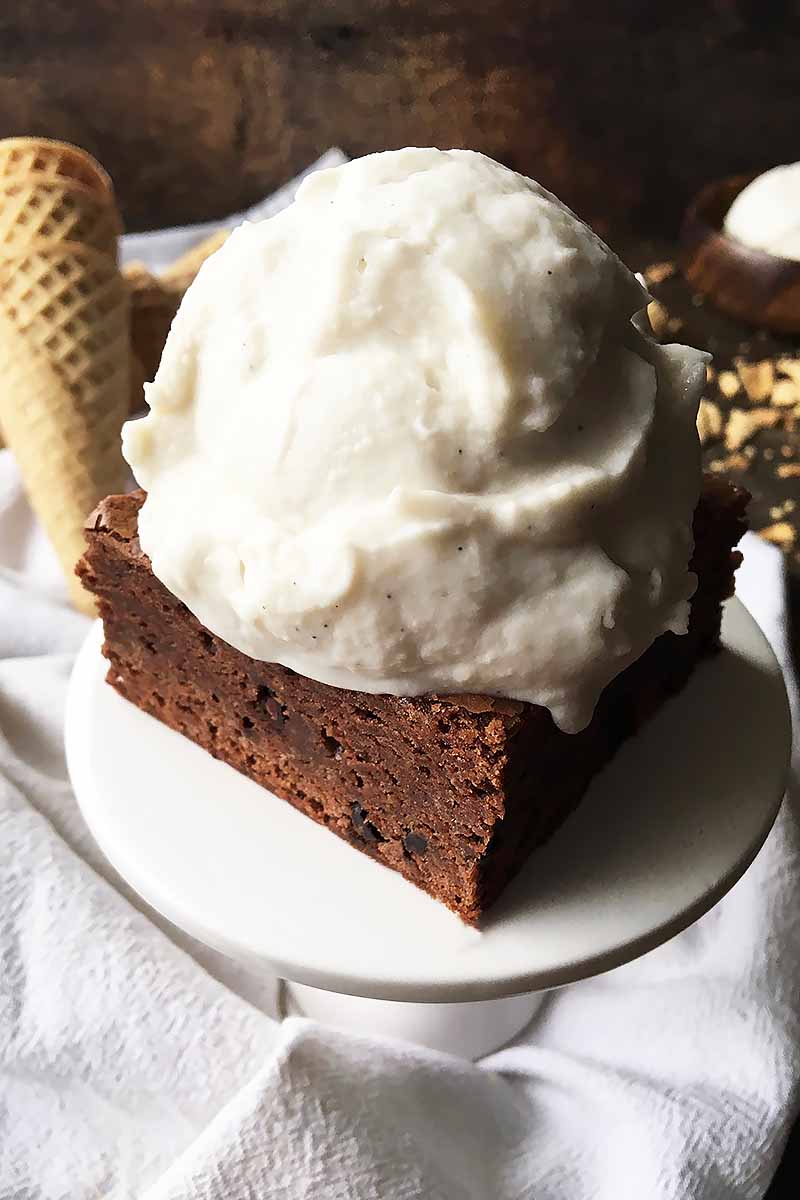
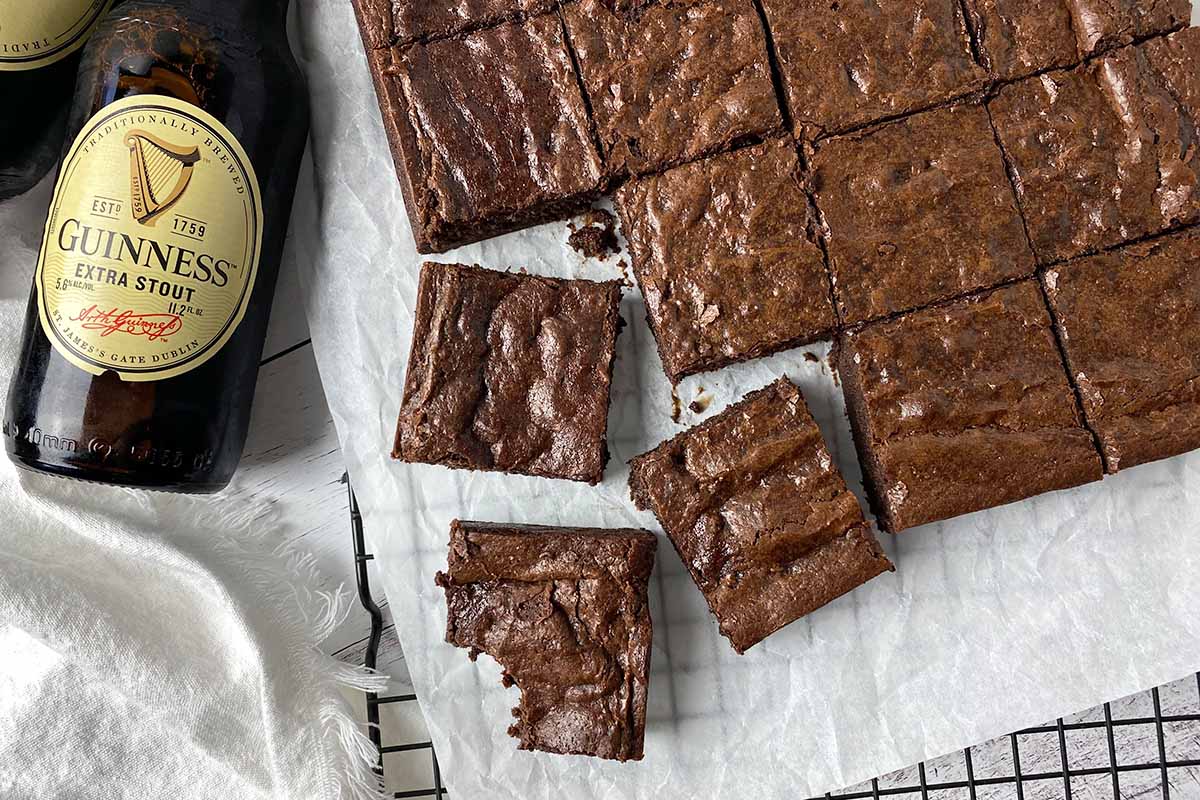
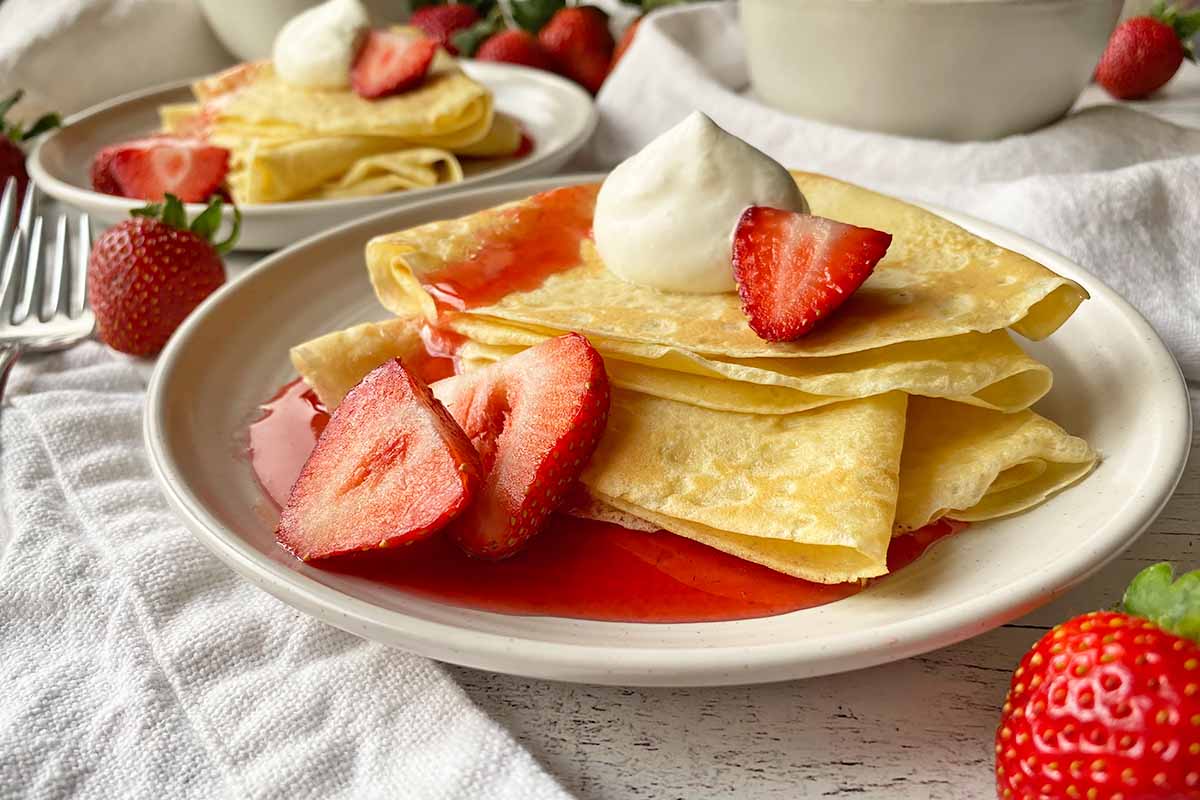
Serve it with your favorite vegan sweets, like fresh summer berries, crumbled cookies, or mochi bites. You can warm a chocolate brownie and serve a hefty scoop of this frozen delight on top. Swirl your favorite jam in the base, like our strawberry basil jam ice cream.
Place a scoop in a bowl, and pour hot espresso on top to make an affogato, an Italian drink/dessert fusion.
Or just enjoy it as is: pure, simple, and perfect.
More, please! If you want a second helping of vegan sweets, check out the following recipes:
- Chocolate Torte with Avocado Mousse
- Lemon Bars
- Chocolate Wacky Cake
- Key Lime Whoopie Pies
- Dairy-Free Chocolate Cherry Ice Cream
I can’t wait for you to make this recipe! How will you serve your frozen treat? Plain, or with a variety of toppings? Let me know in the comments below.
Photos by Nikki Cervone, © Ask the Experts, LLC. ALL RIGHTS RESERVED. See our TOS for more details. Originally published by Shanna Mallon on June 16, 2009. Last updated: July 7, 2023 at 16:54 pm.
Nutritional information derived from a database of known generic and branded foods and ingredients and was not compiled by a registered dietitian or submitted for lab testing. It should be viewed as an approximation.
About Nikki Cervone
Nikki Cervone is an ACS Certified Cheese Professional and cheesemonger living in Pittsburgh. Nikki holds an AAS in baking/pastry from Westmoreland County Community College, a BA in Communications from Duquesne University, and an MLA in Gastronomy from Boston University. When she's not nibbling on her favorite cheeses or testing a batch of cupcakes, Nikki enjoys a healthy dose of yoga, wine, hiking, singing in the shower, and chocolate. Lots of chocolate.
confession time. i have a fear of vegan foods. i don’t know why. i fear that it is missing things, most of all FLAVOR. i understand vegetarianism (is that a word?) but i cannot wrap my head around veganism. however, your ice cream looks like regular ice cream in that it appears to be creamy, cold, and rather perfect.
i will keep in mind to not consume ice cream and then chase with breakfast foods. 🙂
oh my soul. I want some! with the two new kiddos and the boy I babysit, times for cooking are becoming SLIM. boo hoo… but hey ..I might just have to set some time aside……..
I don’t have an ice cream maker, but this post seriously makes me want to go out and get one because all three of these sound AMAZING. Yum! I’d love to try me some vegan ice cream.
I am an ice cream addict. It’s my biggest weakness! It would do me good to try out those recipes. They sound excellent!
OMG the ice cream in these photos makes me want some right away. Like now. I love Bobtail ice cream, especially in summer. I can’t wait to get some this weekend.
I’m not a vegan (or even vegetarian), but this ice cream sounds great and I might have to try it out!
Oh, I want some so badly!
That looks great! Thanks so much, I’m going to try it!
This recipe sounds great for dairy-allergy kiddo! But she’s also allergic to corn; do you know if arrowroot starch can be used instead of corn starch?
Thanks so much, Jessica! Arrowroot starch is a very popular substitute for cornstarch. While we haven’t tested this ourselves in this recipe, you should be able to use it instead of cornstarch to yield a similar texture. I would say try an equal amount of it – one tablespoon – and let us know how it turns out!